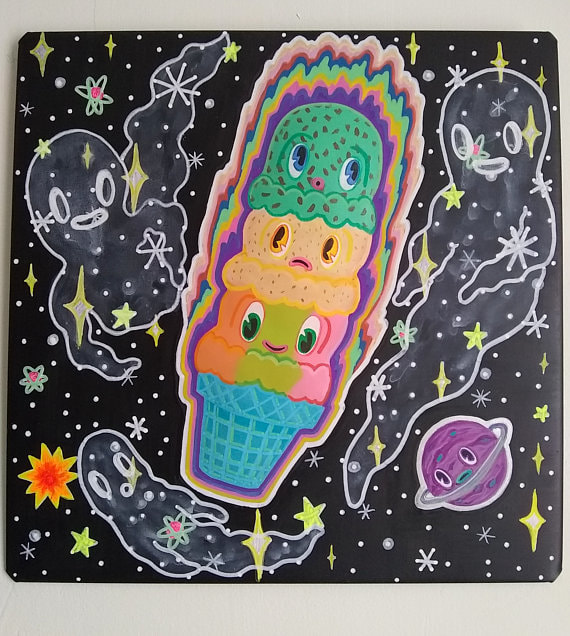
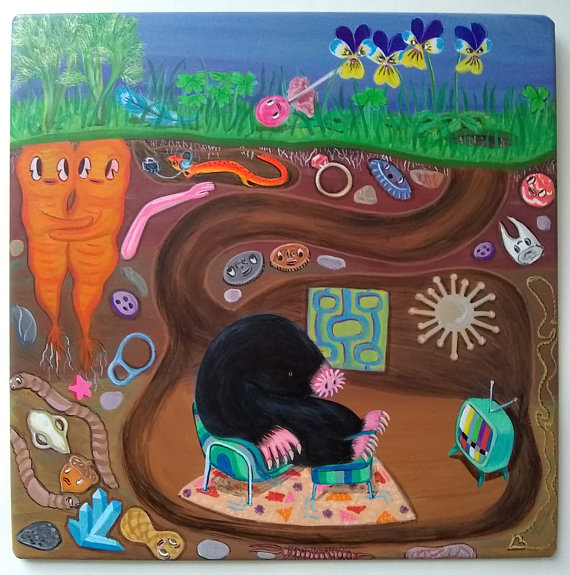
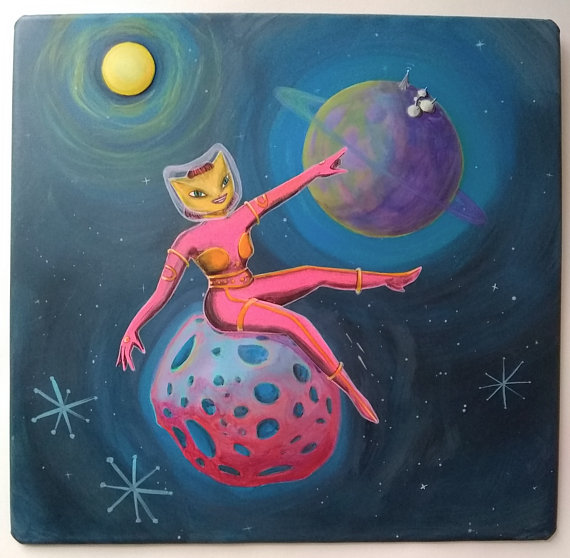
My lovely, good friend is selling on etsy now. Check out her work, it's cute, crazy and fun.
www.etsy.com/shop/AGblend13
Have a great day!
www.etsy.com/shop/AGblend13
Have a great day!

|
My lovely, good friend is selling on etsy now. Check out her work, it's cute, crazy and fun. www.etsy.com/shop/AGblend13 Have a great day! I am taking a break from posting to my site, maybe temporarily or forever. If I have any loyal visitors, thank you for your interest. It's been fun!
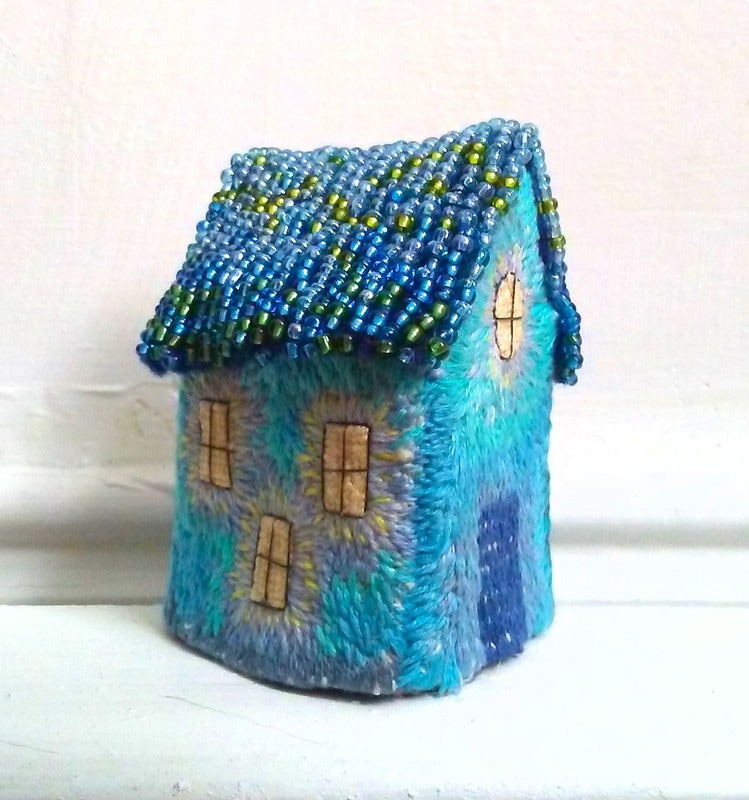
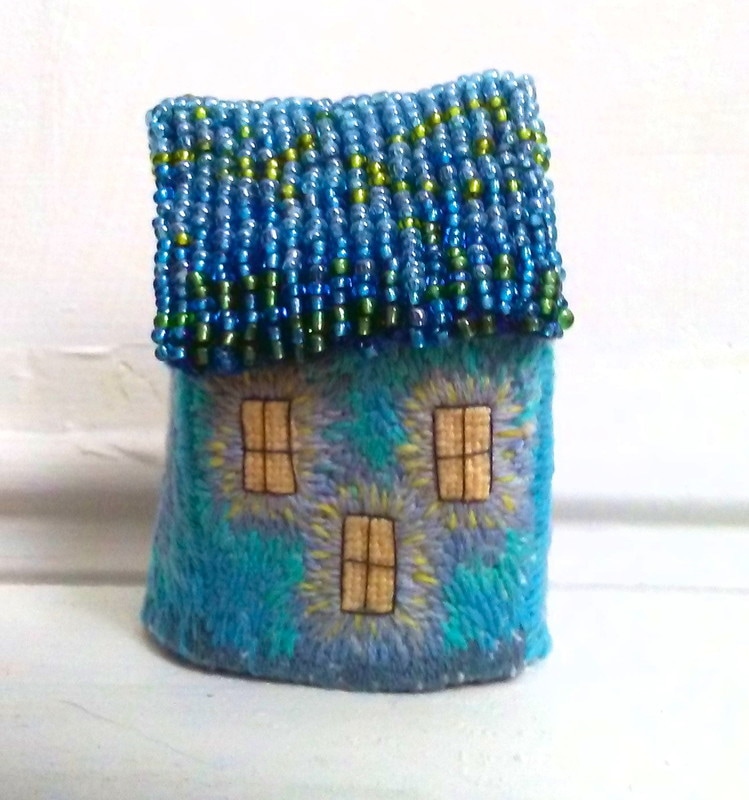
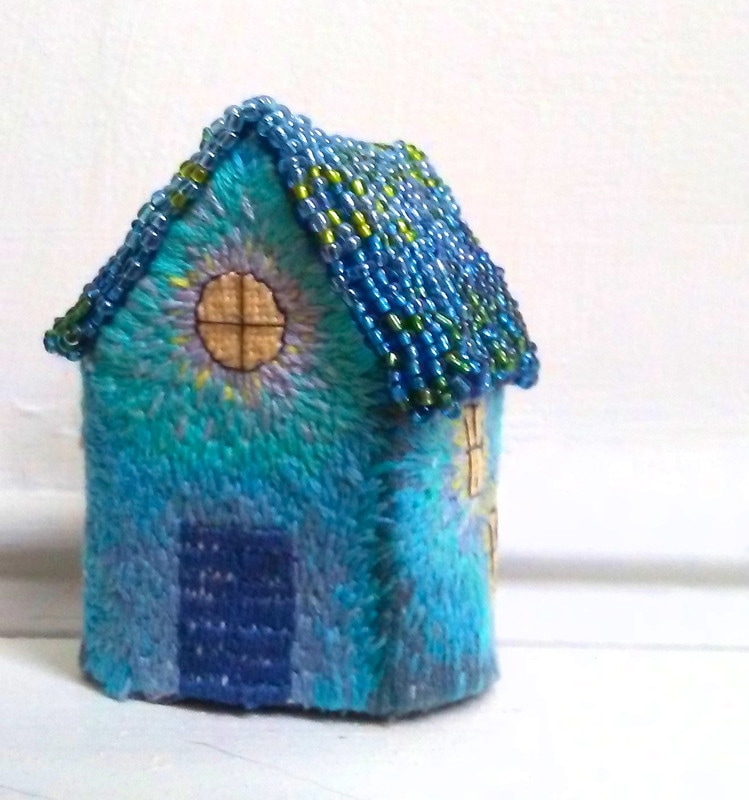
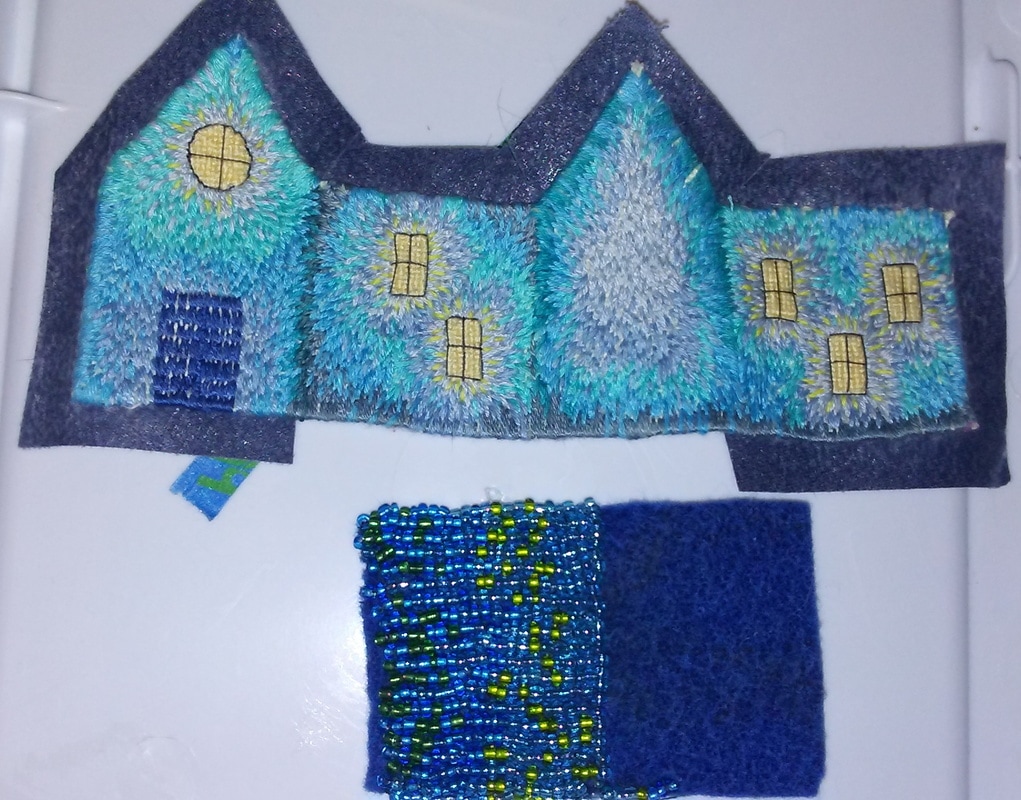
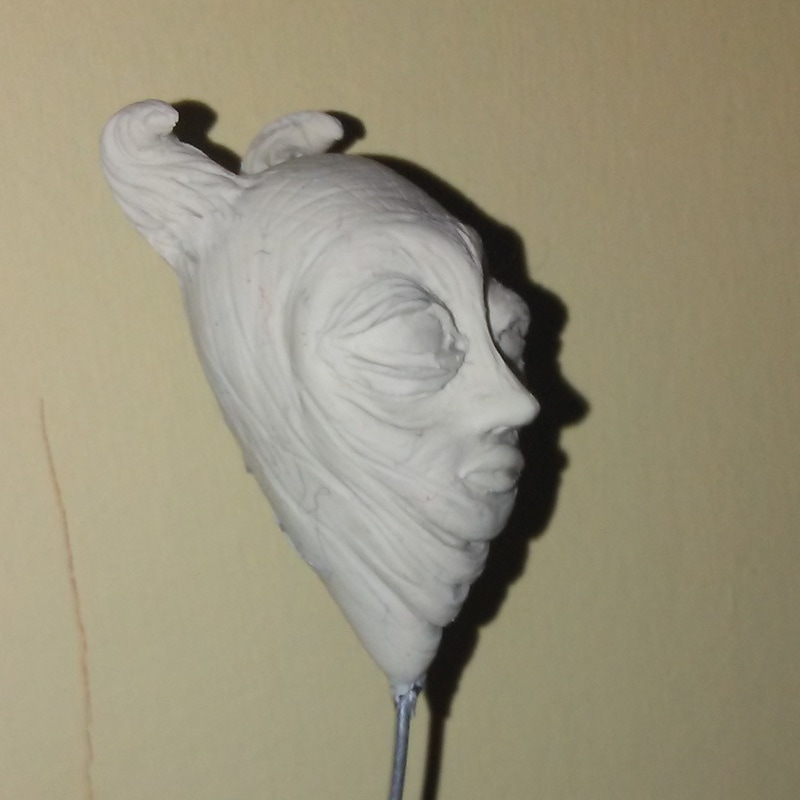
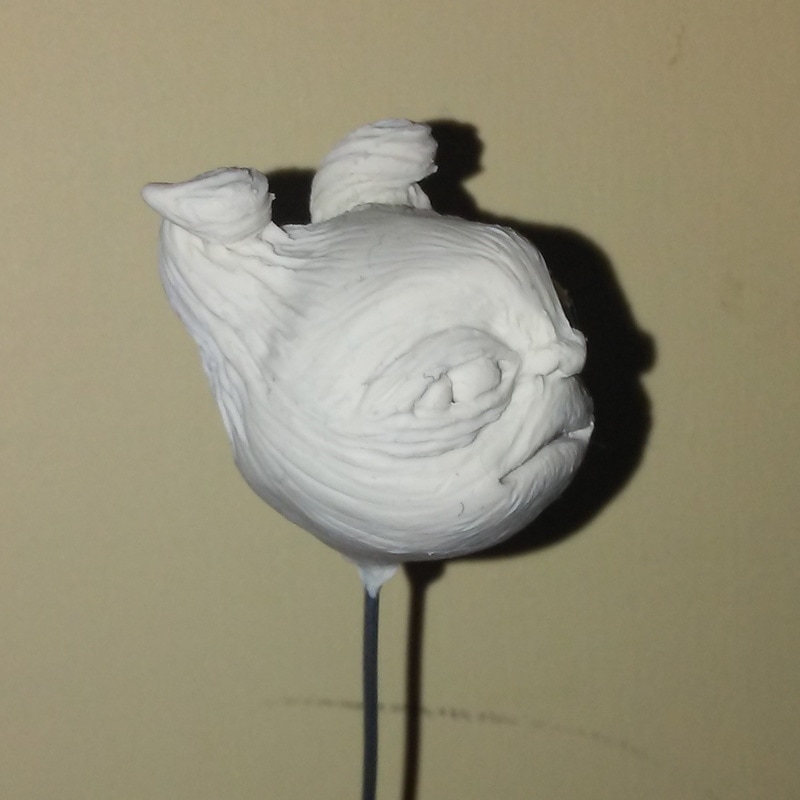
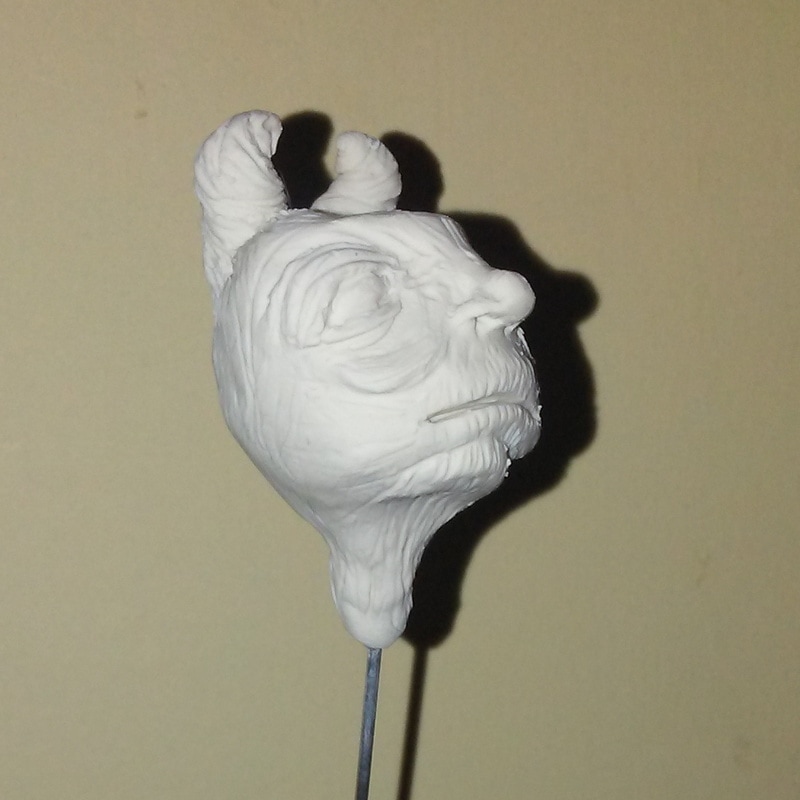
🍔 House 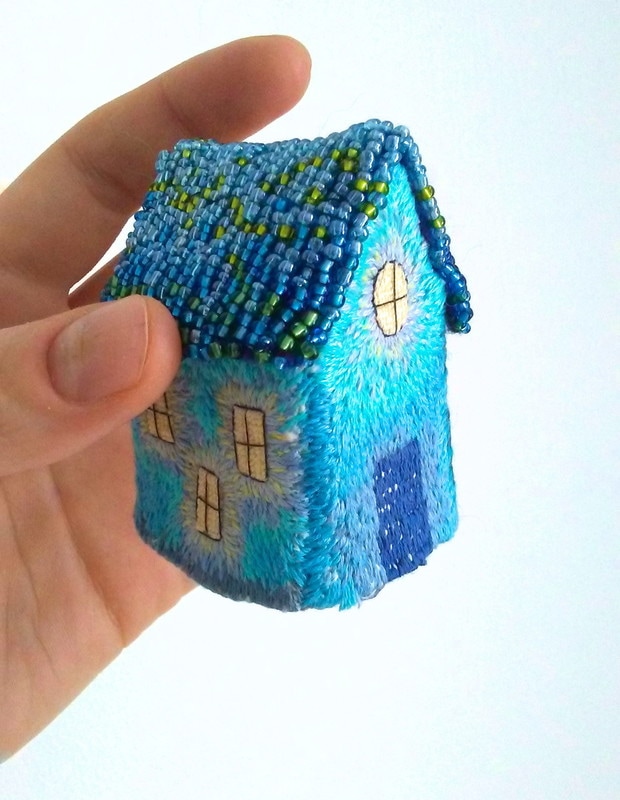 Tiny home is stitched using six-strand embroidery floss separated into two-strand sections. Roof is made from a dark blue wool felt and four colors of seed beads. 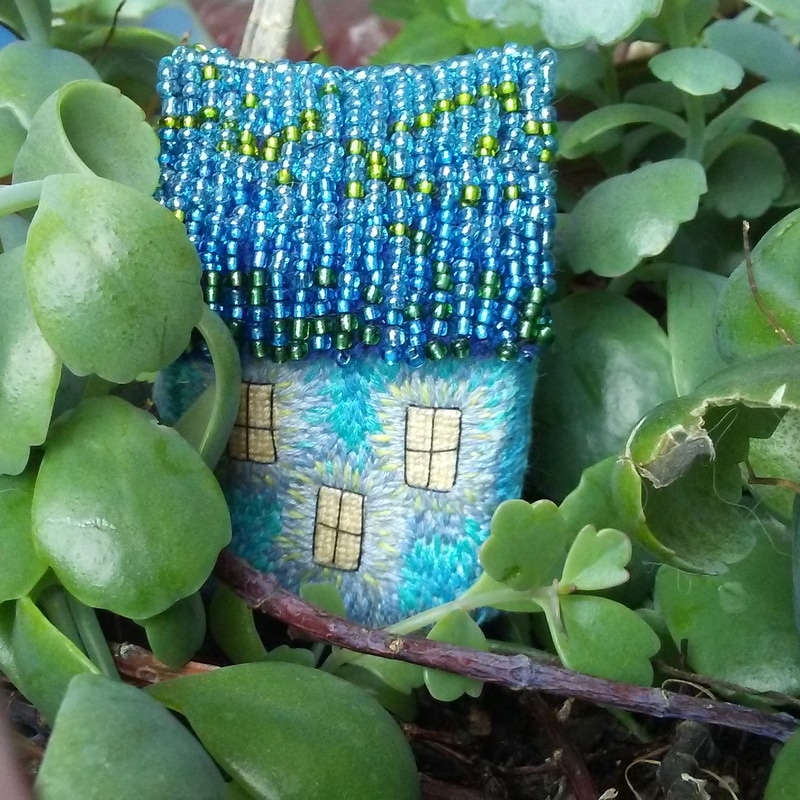 Cell Phone Sleeve 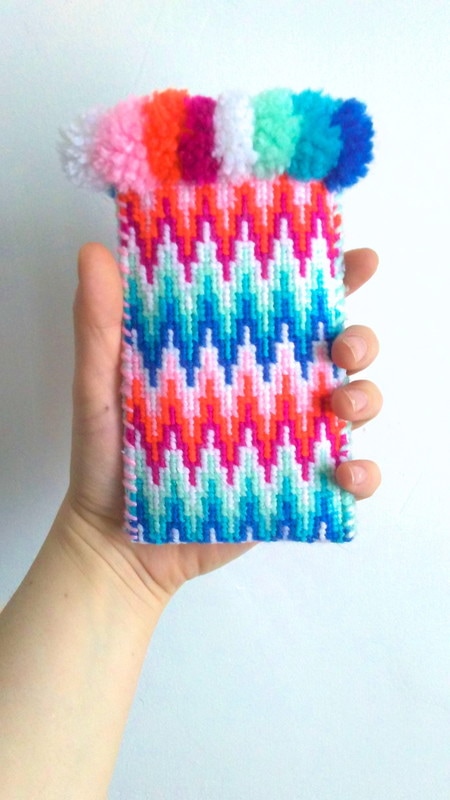 Inexpensive synthetic yarn worked into the stiff canvas I purchased from a thrift store. One half is a simple bargello pattern and the other side a free-form geode style design with the same gradient. Hand wound tiny pom poms sewn to the top serve as a fluffy dirt blocker and closure. Lining is soft, kitteny fleece that happens to function as a great screen cleaner. Hand-sewn throughout. 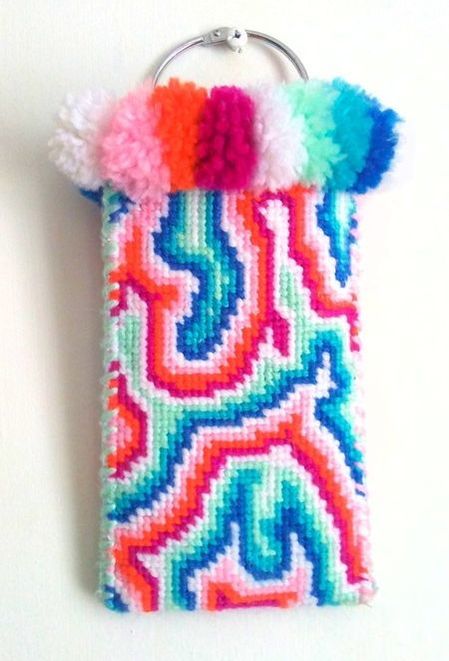 Creatures  Aluminum foil ball formed on the end of thick aluminum wire serves as a base for white sculpey clay. The only tools used were a toothpick and metal nail file. Once baked and cooled, painted with acrylic paint. I can thank my Dark Crystal / Labyrith / Mirrormask movie marathon for inspiring these little wrinkly faces. Not sure what I'm going to do for bodies yet, but they will be worm-like. Some useful advice from my mom was to make a nub at the bottom of doll heads to aid attaching to a body. Unfortunately her helpful sketch came to me a little late. 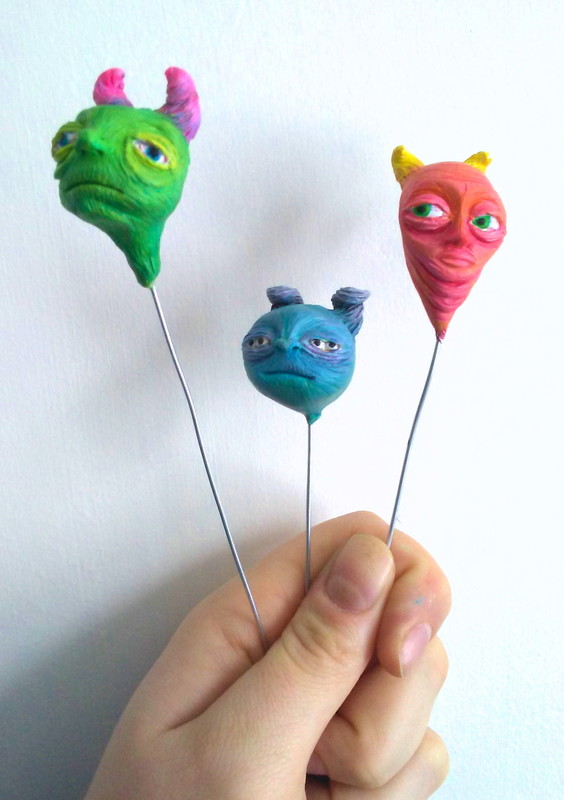 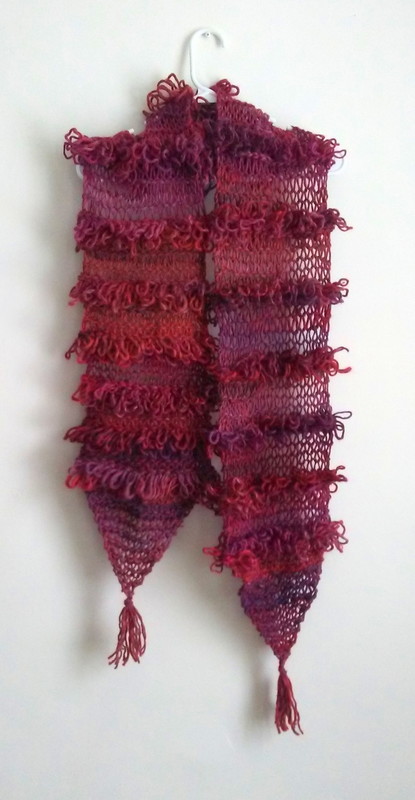 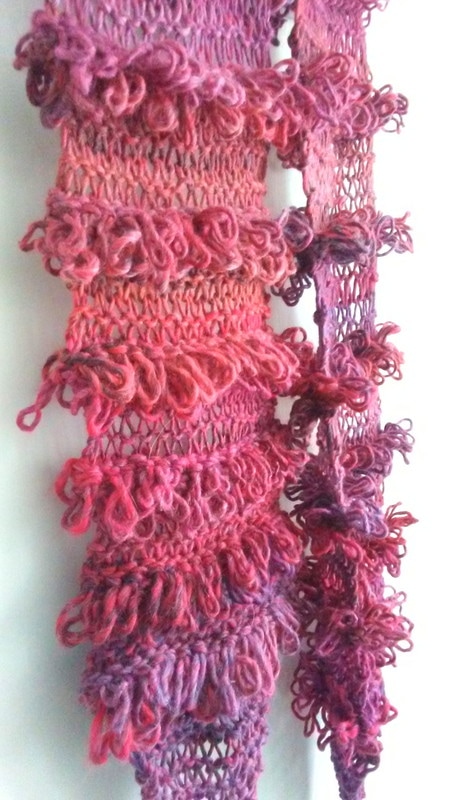 I salvaged this yarn from a sweater. I cast on 18 stitches using 9mm needles, and alternated with knitting 6 rows then 4 rows of loops. By knitting the plain areas very loosely I lightened the scarf visually, and also literally because if it were all loops I think it would be too thick and hot for comfort. Once the body of the scarf was finished I thought of adding the tapered sections, so those were knitted separately and sewn to the squared ends of the scarf. The tapers were easy: I cast on 18 stitches and at the end of each row picked up two stitches at once which evenly reduced the piece into a neat triangle. Learning to knit loops was a little confusing at first, until I found a Youtube video which made it all clear. With a few different methods for holding knitting needles and executing stitches I recommend watching various videos and practicing the stitches until you find a technique that works for you. By starting and unraveling about fifteen test pieces here is what I learned about loops: * To make the loops only on one side of the piece you create a row of loops, then knit or purl the next row, then next row all loops. * Looping every row puts the loops on both sides of your work, which is what I did for the scarf by consecutively knitting four rows of loops. * Loop one knit one (or loop one, knit two... whatever) gives you a lighter effect and the work goes a bit quicker. * If you use a really thick yarn and do the loops on one side it makes a super soft and plush piece that I think would be very nice as a seat cushion. For this scarf I "locked" each stitch individually as I did it, which made it a little bulky. If I ever make the loop knit sweater in my Complete Book of Needlecraft the method described calls for you to make the loops without pulling the yarn over each stitch, and instead you complete and close the stitch when you knit the next row in the back, which results in a piece that is less knobbly. (A week ago I would not have understood what I just wrote and I may be doing a bad job describing it; but if you're a beginner I am sure once you learn the loops this will make sense.) I think this stitch is definitely accessible to a beginner. It may take a bit of time to get a quick rhythm going, but it doesn't require you to keep count or follow a pattern to execute a neat effect. Loop It Up!   Cardboard and newspaper paper mache using Mod Podge original. The kitties and speech bubbles are cardboard shapes layered over the base image which gives the piece a highly textured, dimensional feel. Painted with latex and acrylic paint and clear coated with matte Mod Podge. Measures approximately 4 x 7 inches.
Piece can be displayed in any direction.
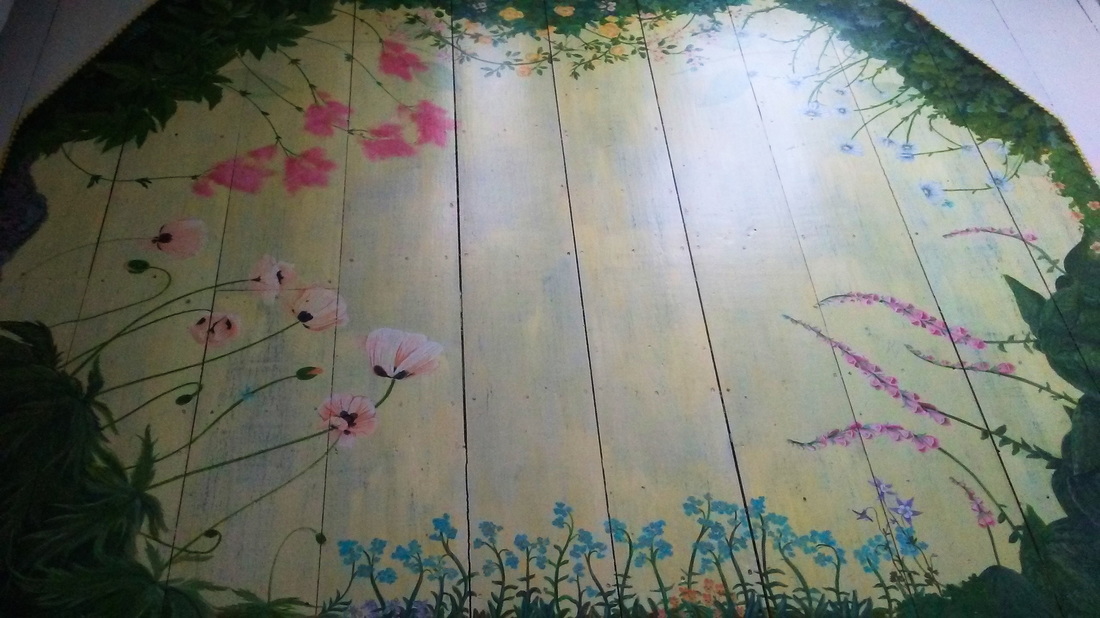 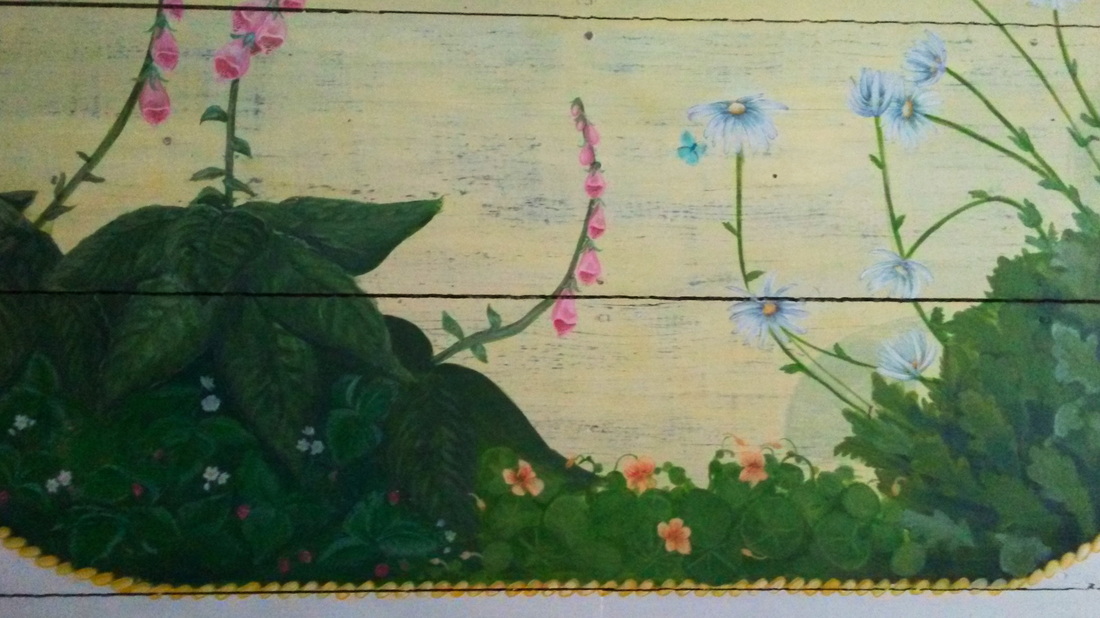 Foxglove, wild strawberry, nasturtium and daisy 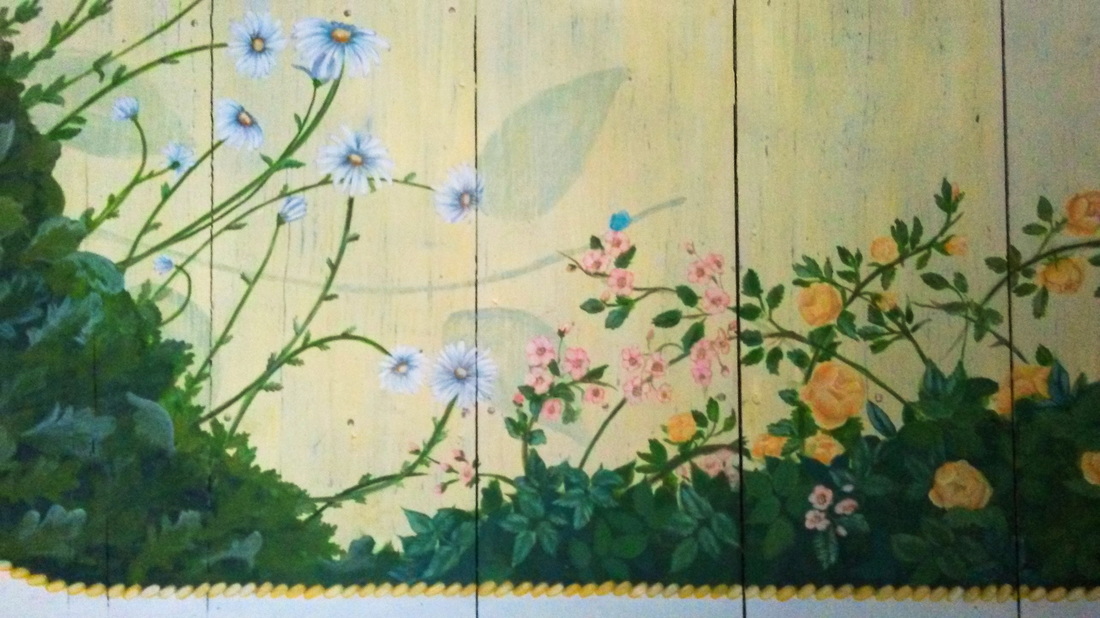 Wild roses and yellow roses 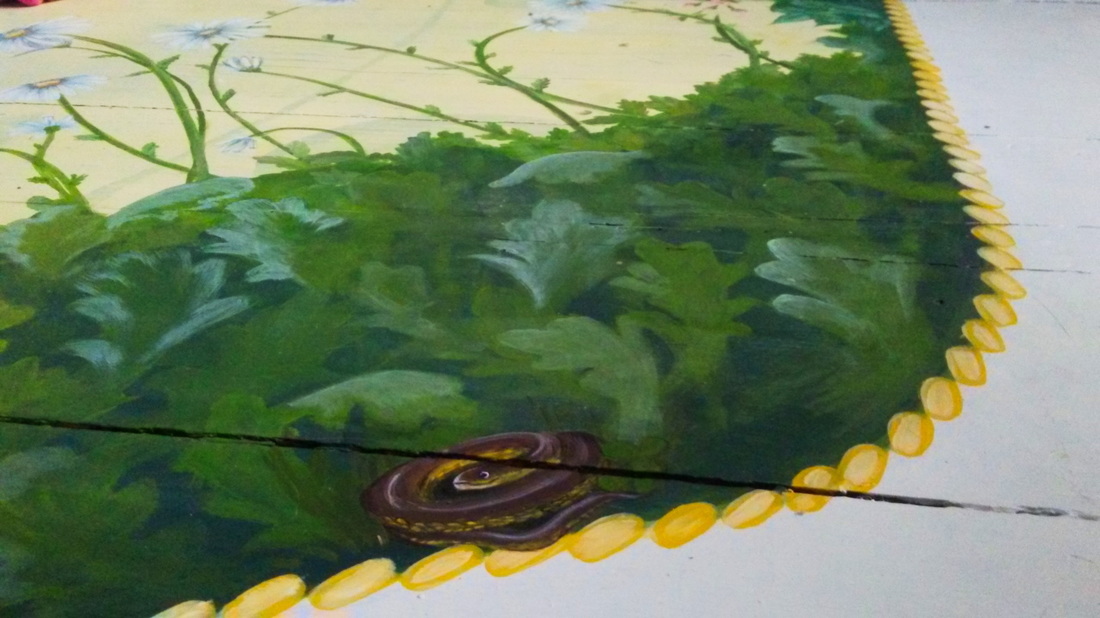 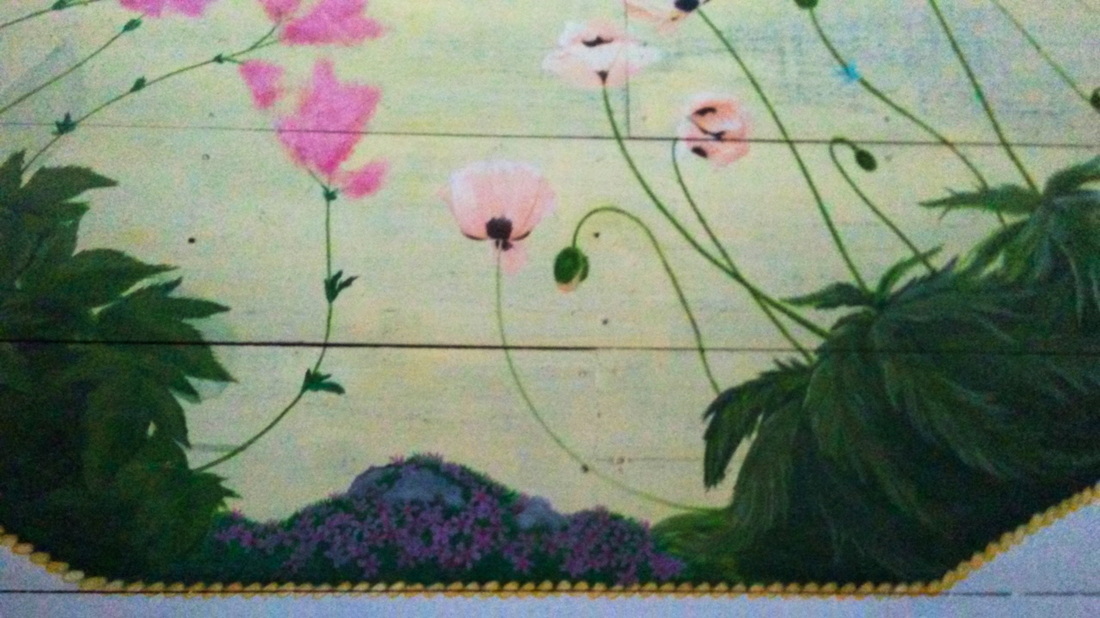 Filipendula, creeping phlox and oriental poppies 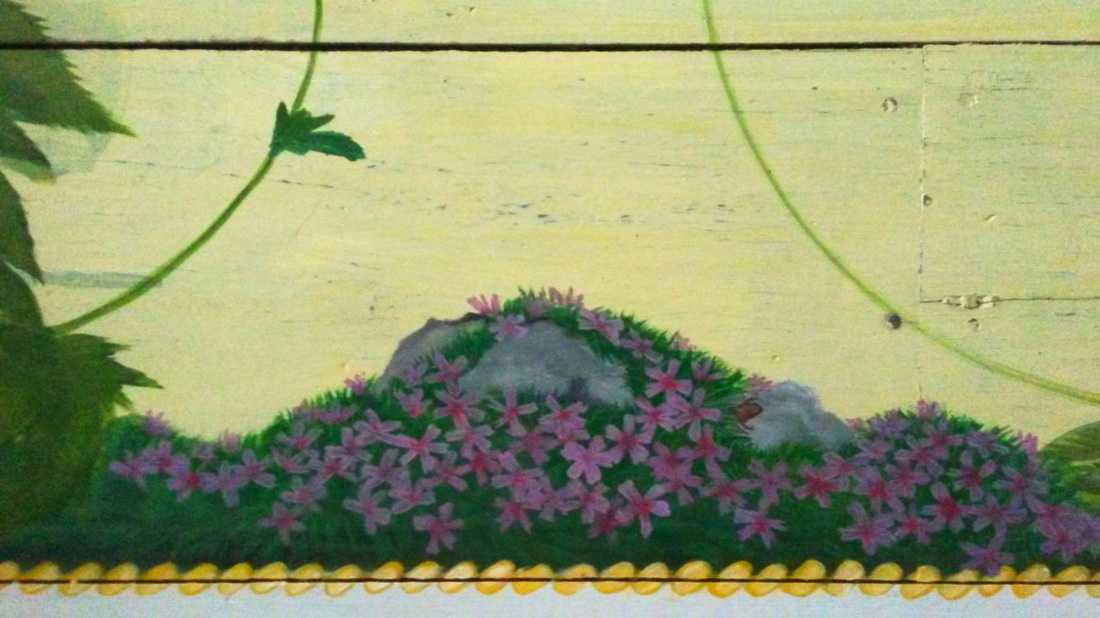 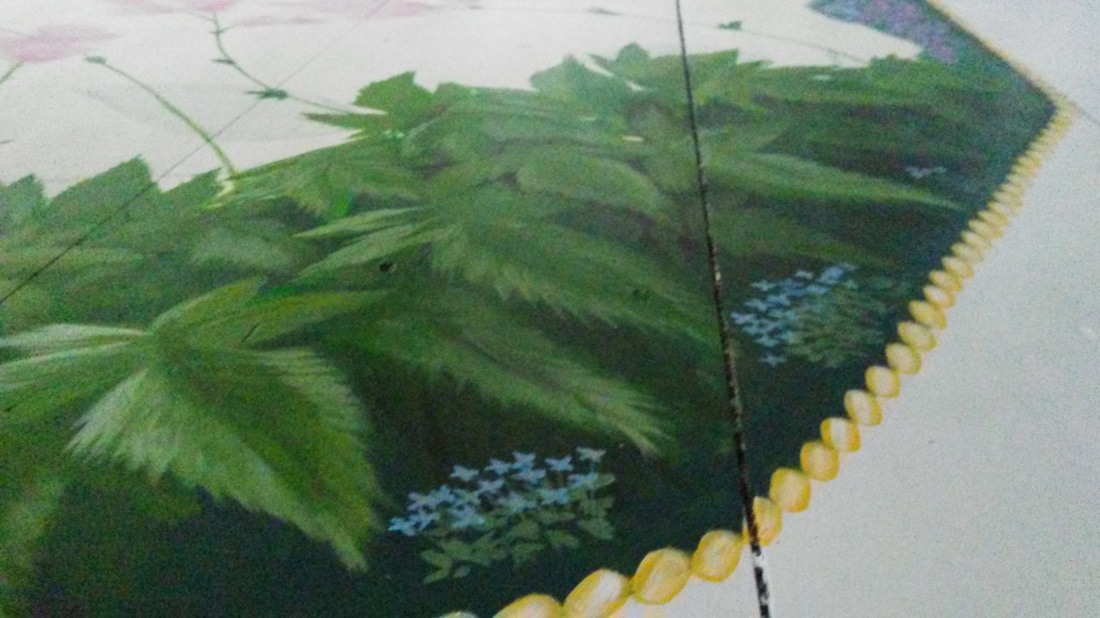 Tiny bluets under filipendula 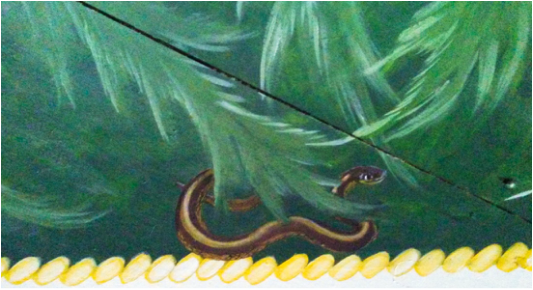 ***
Couldn't think of a fun pun. 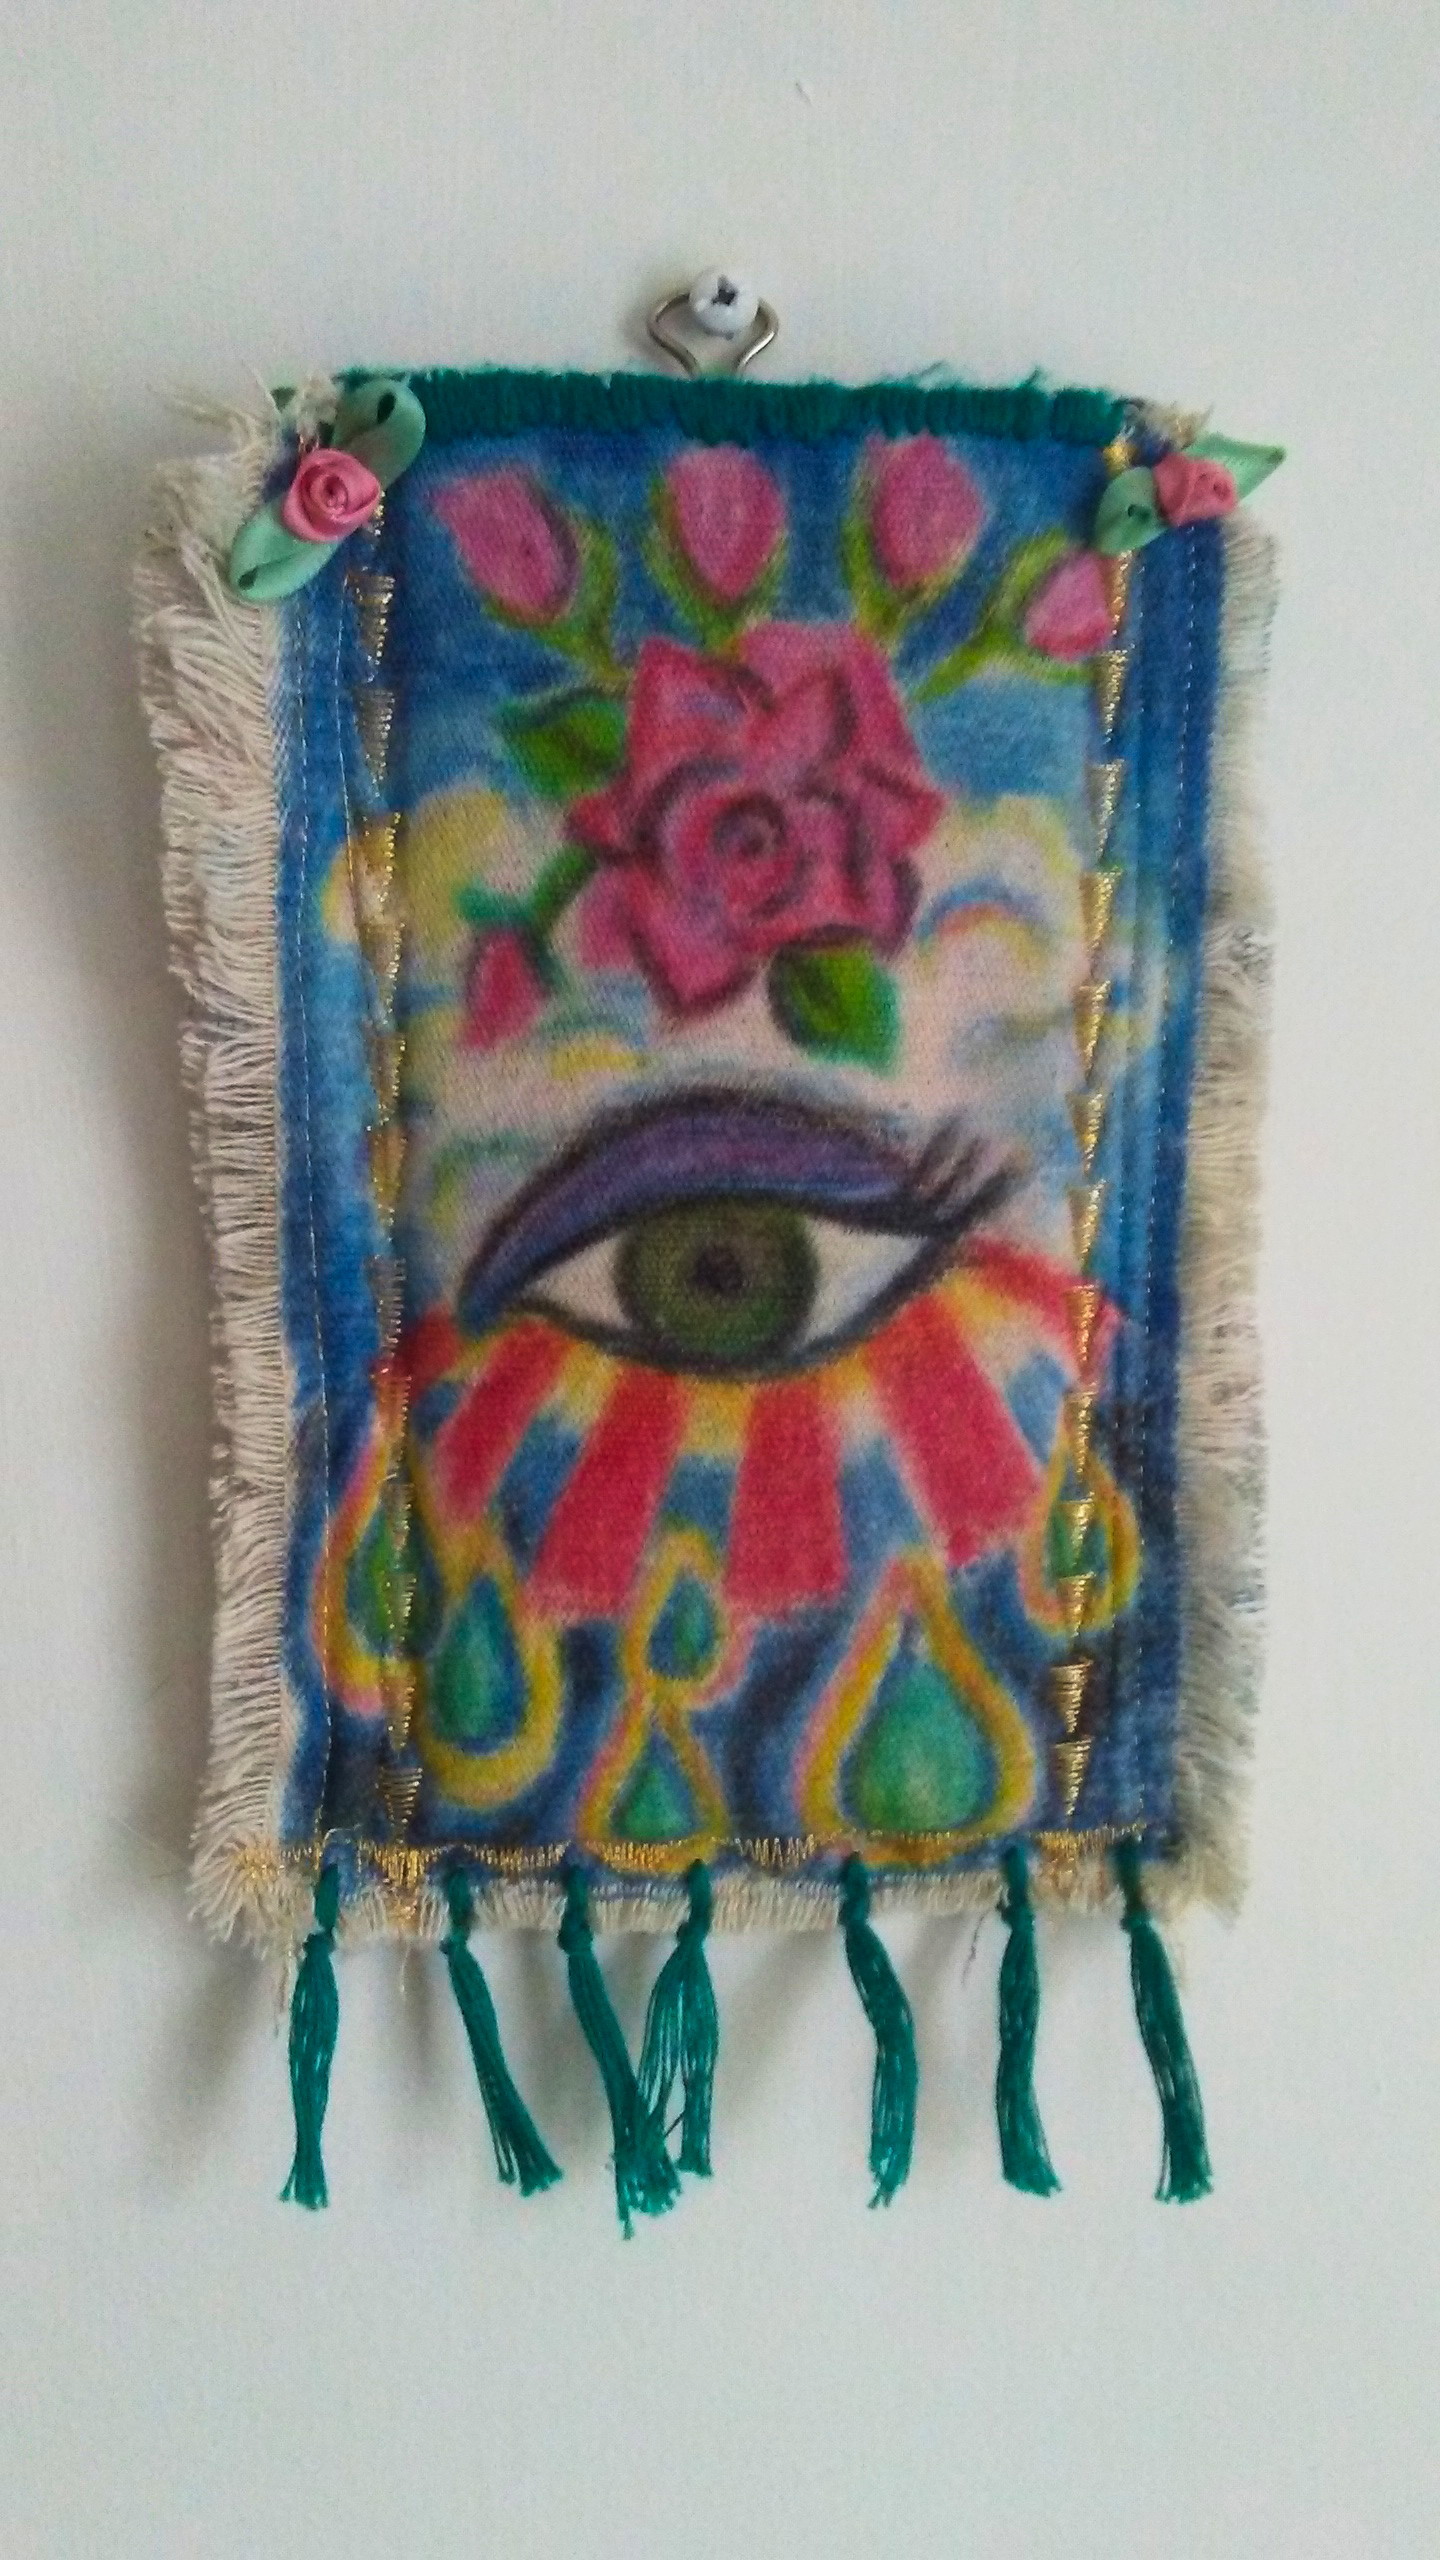 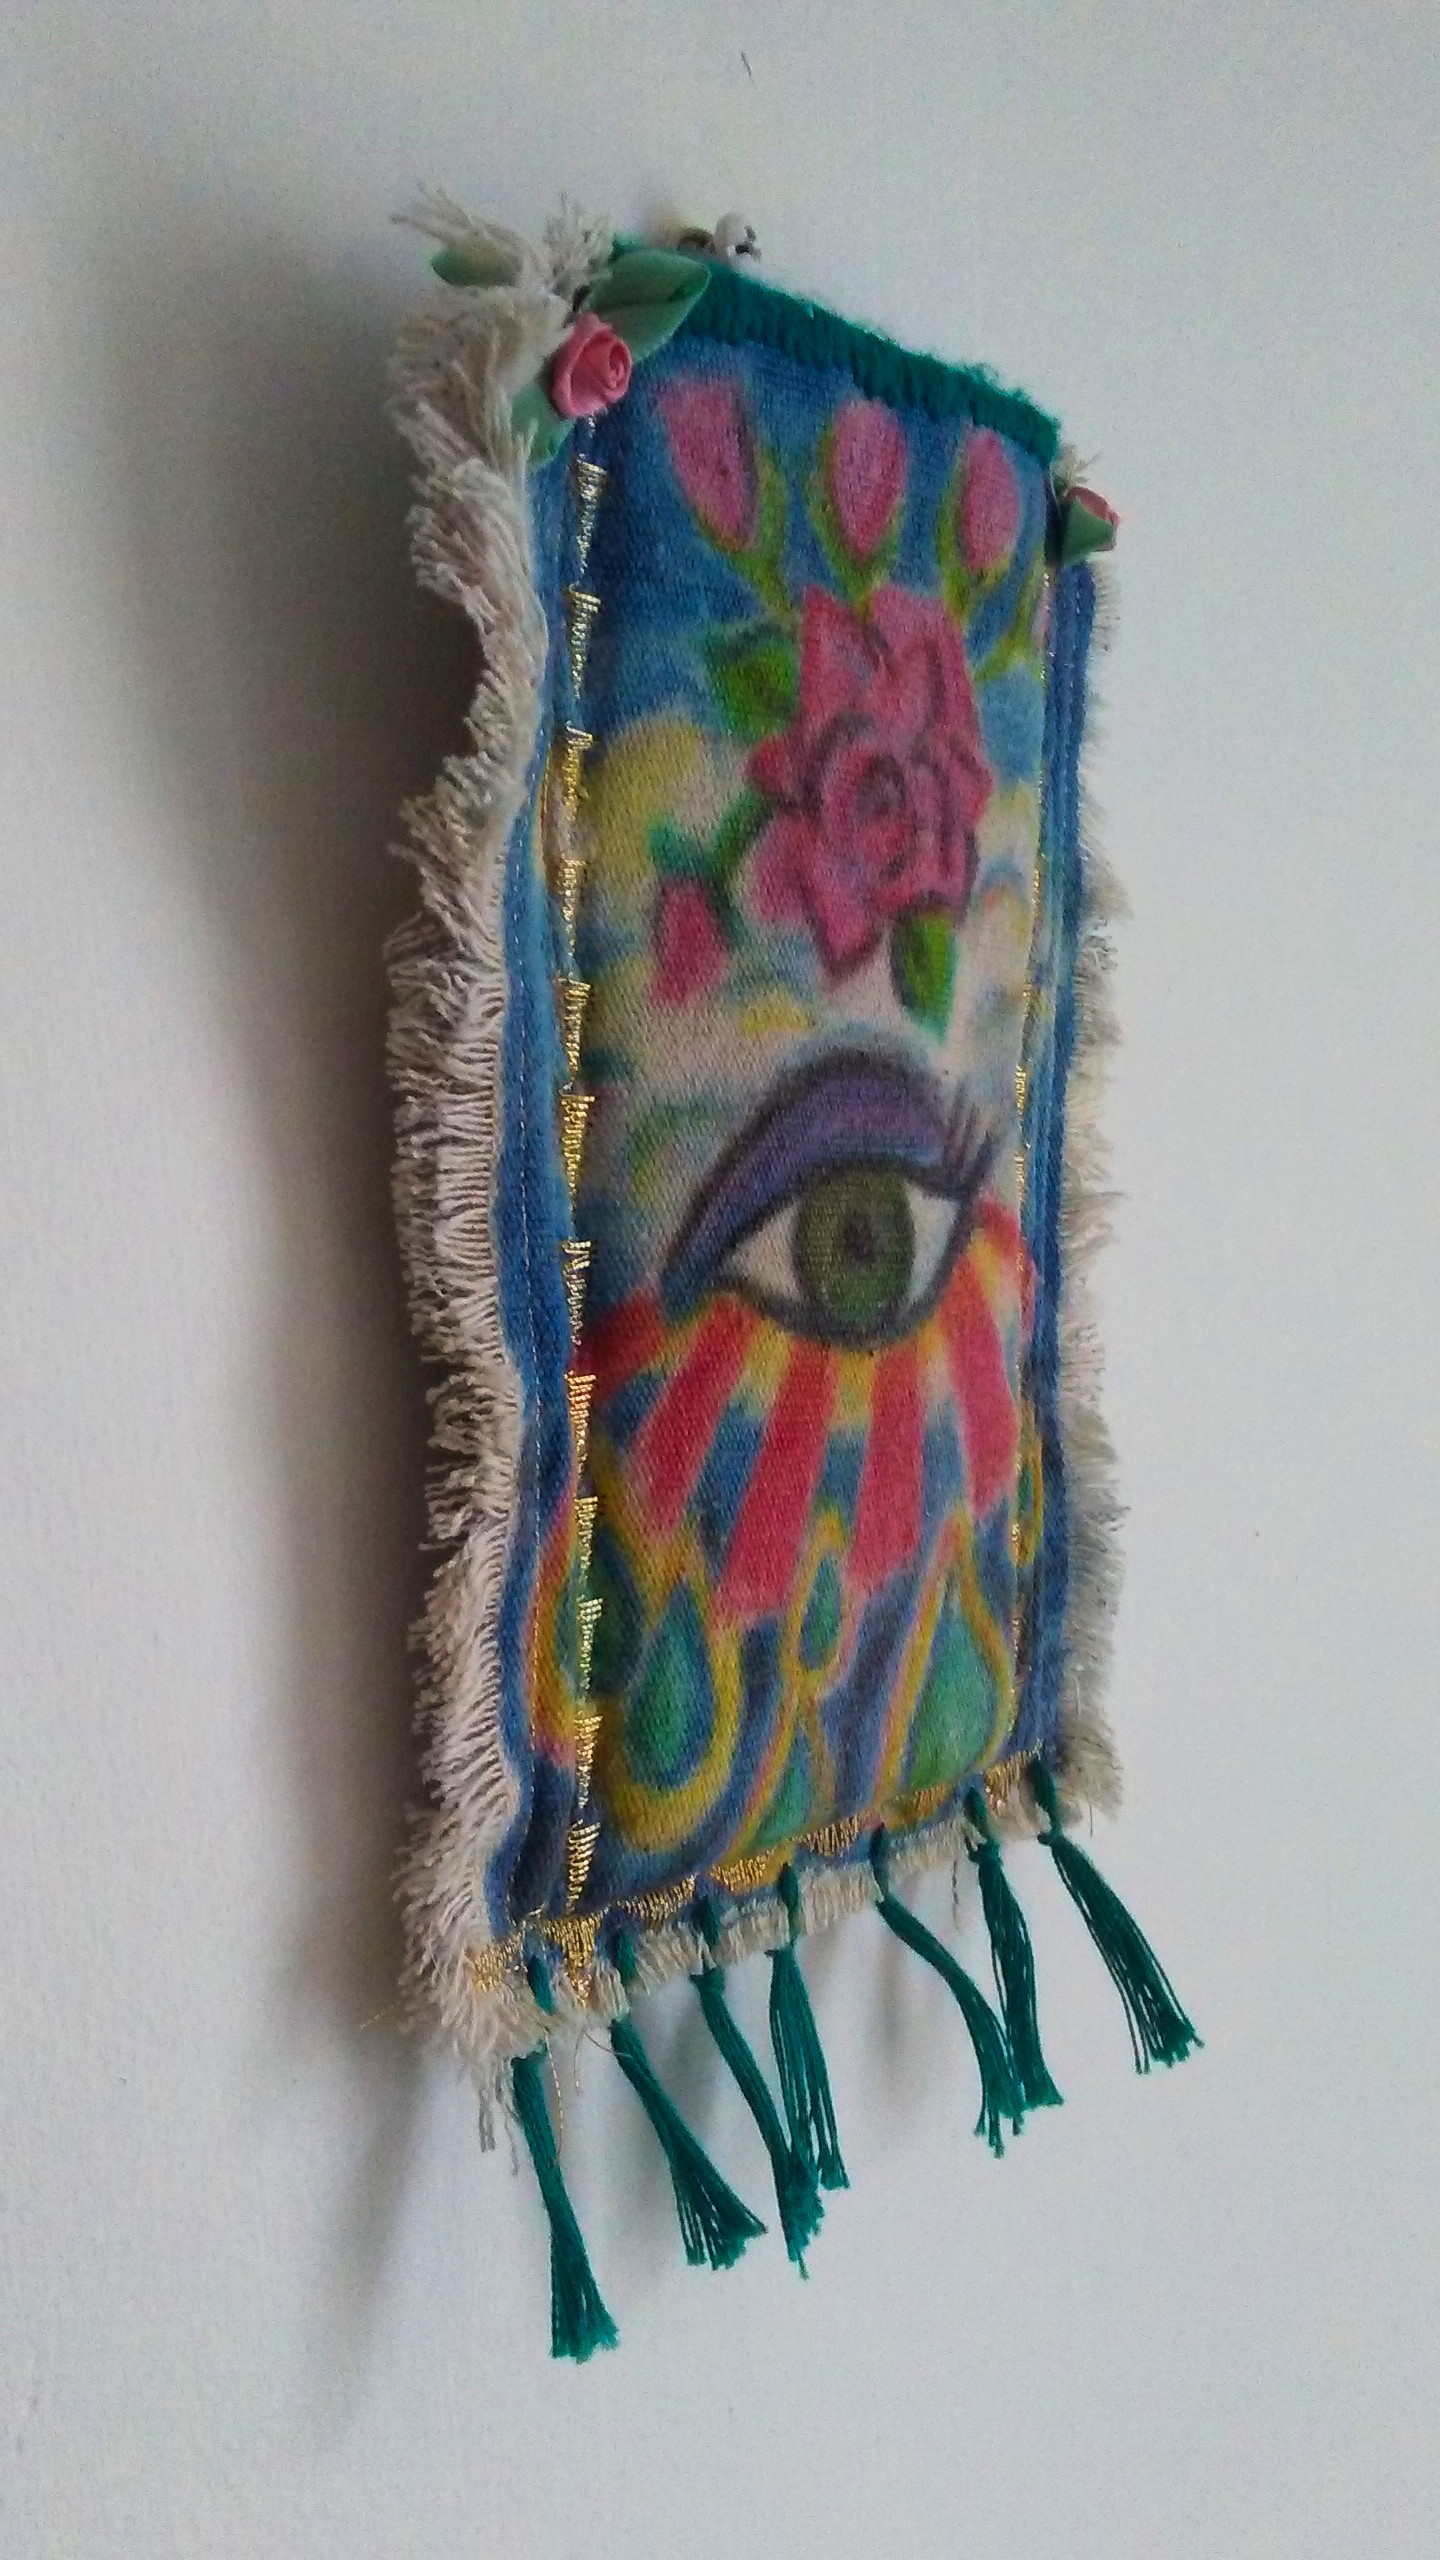 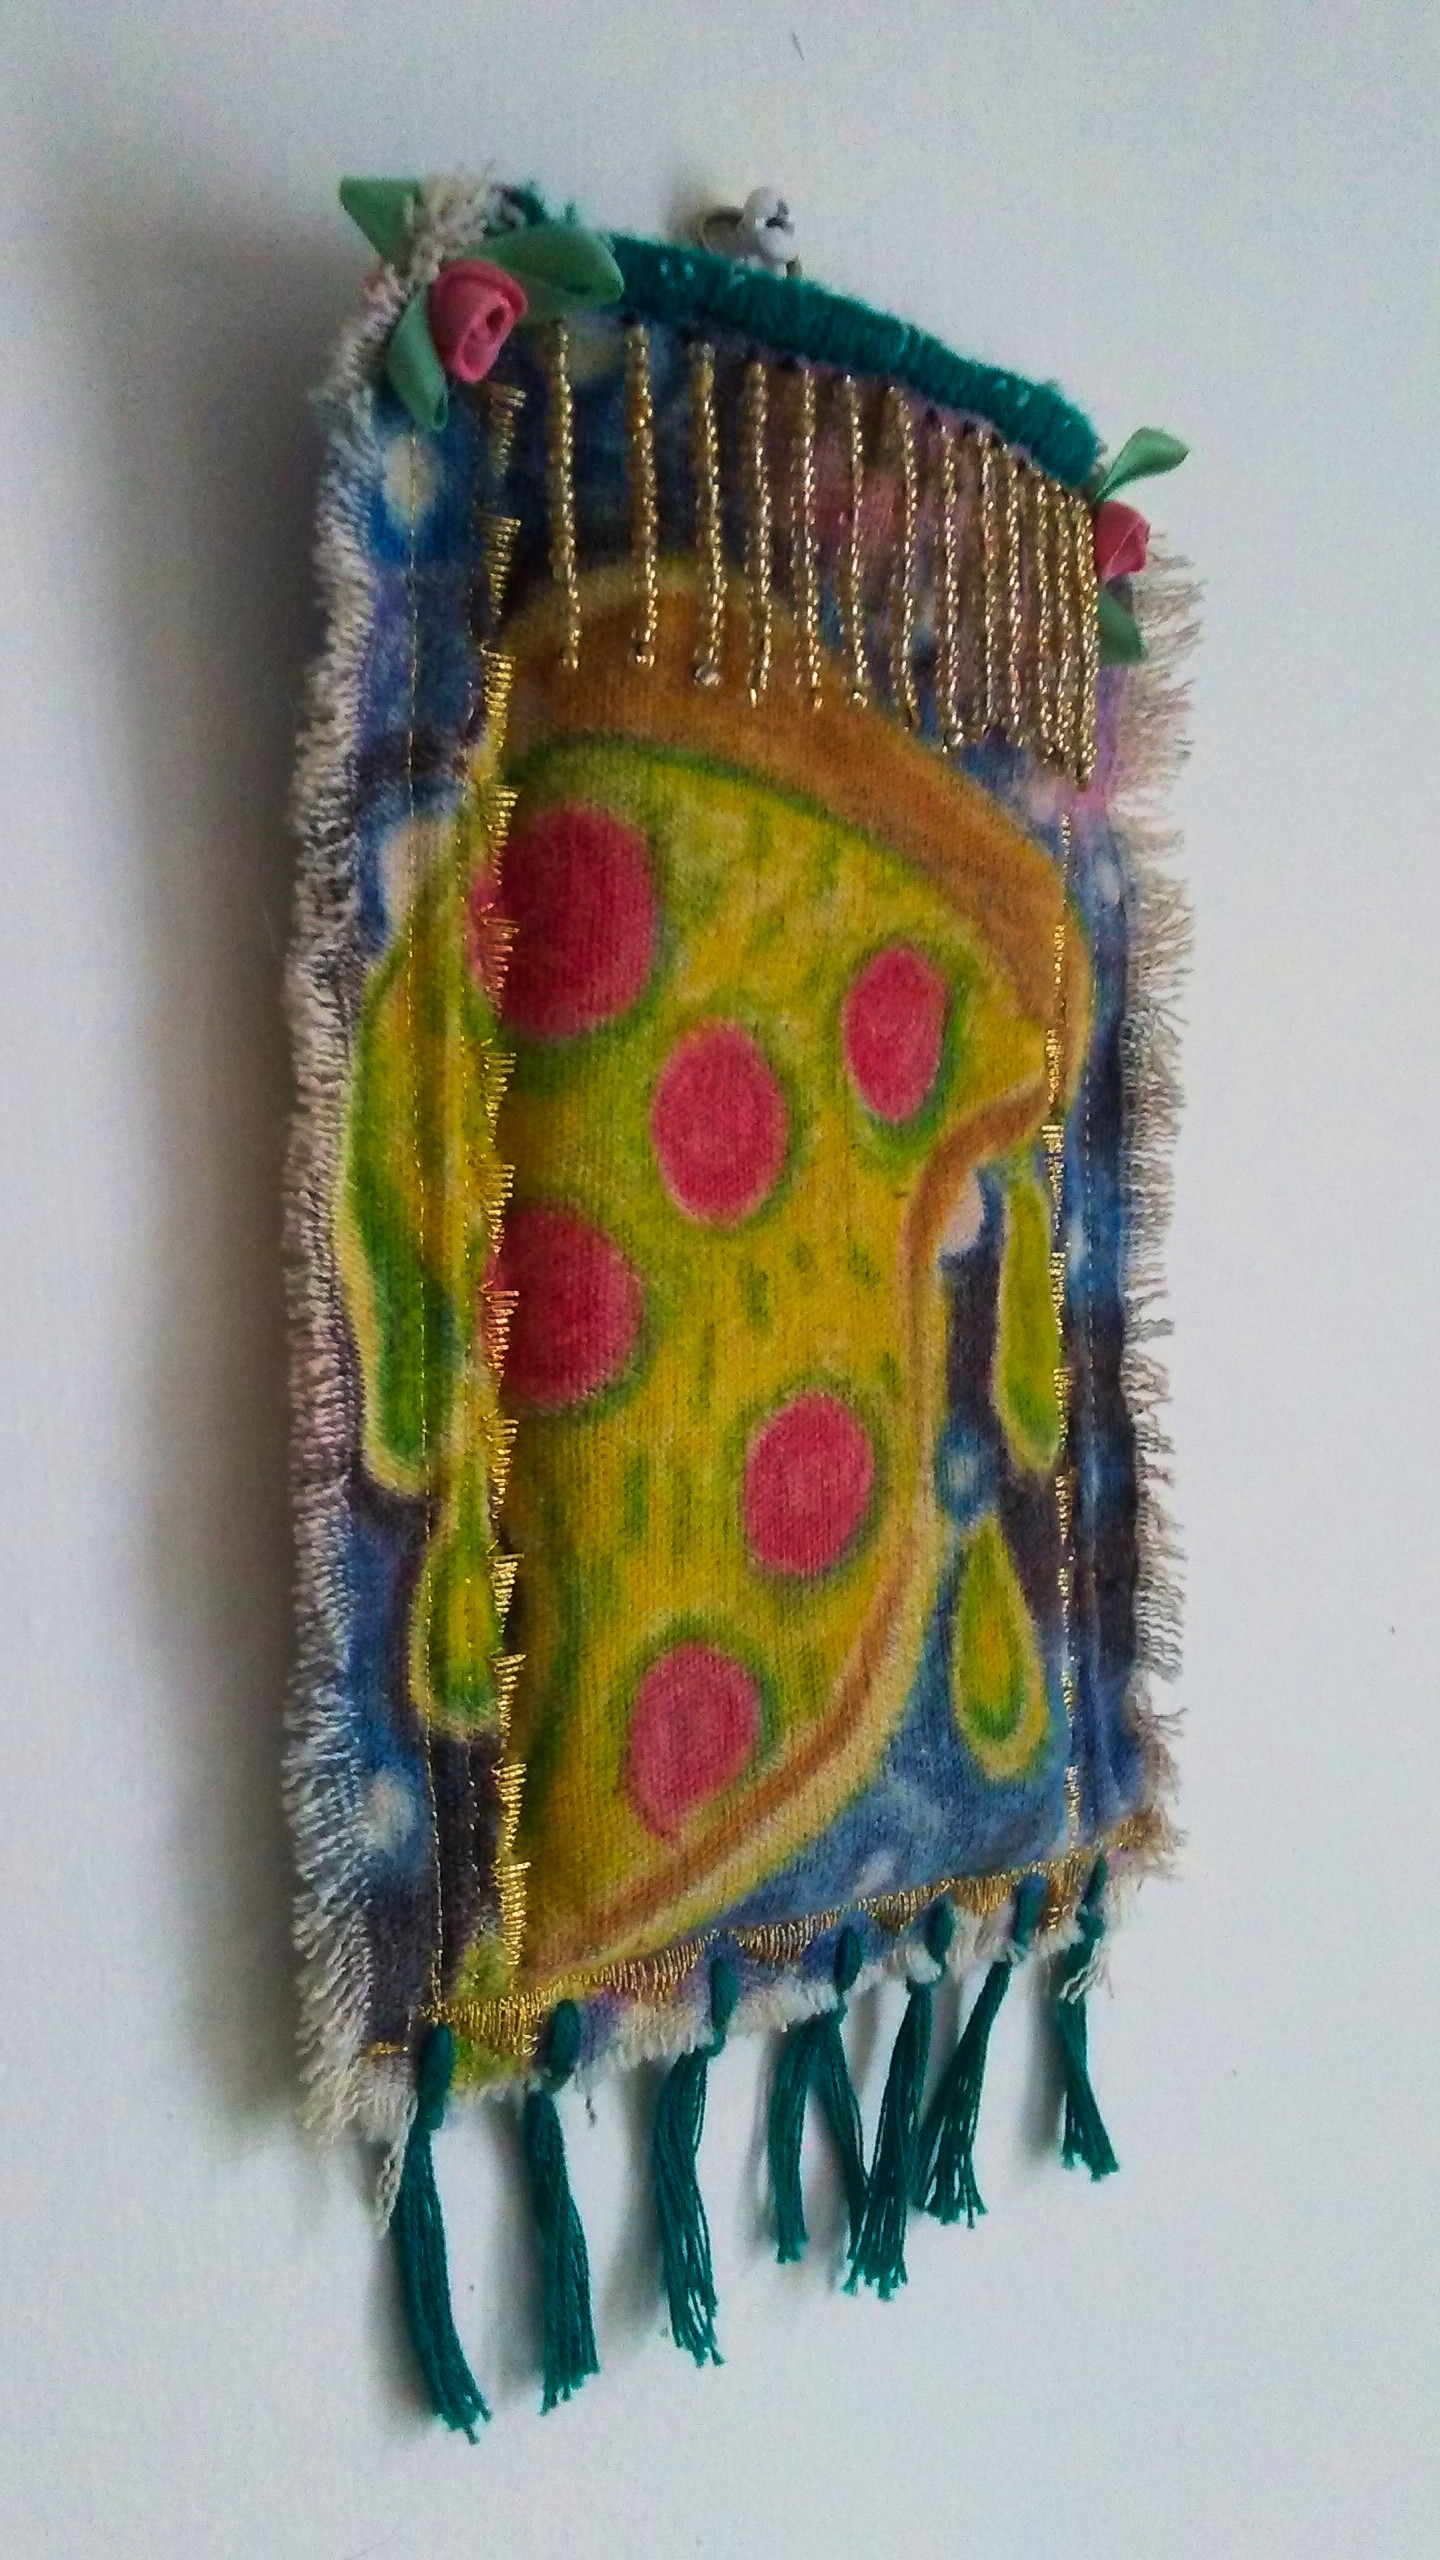
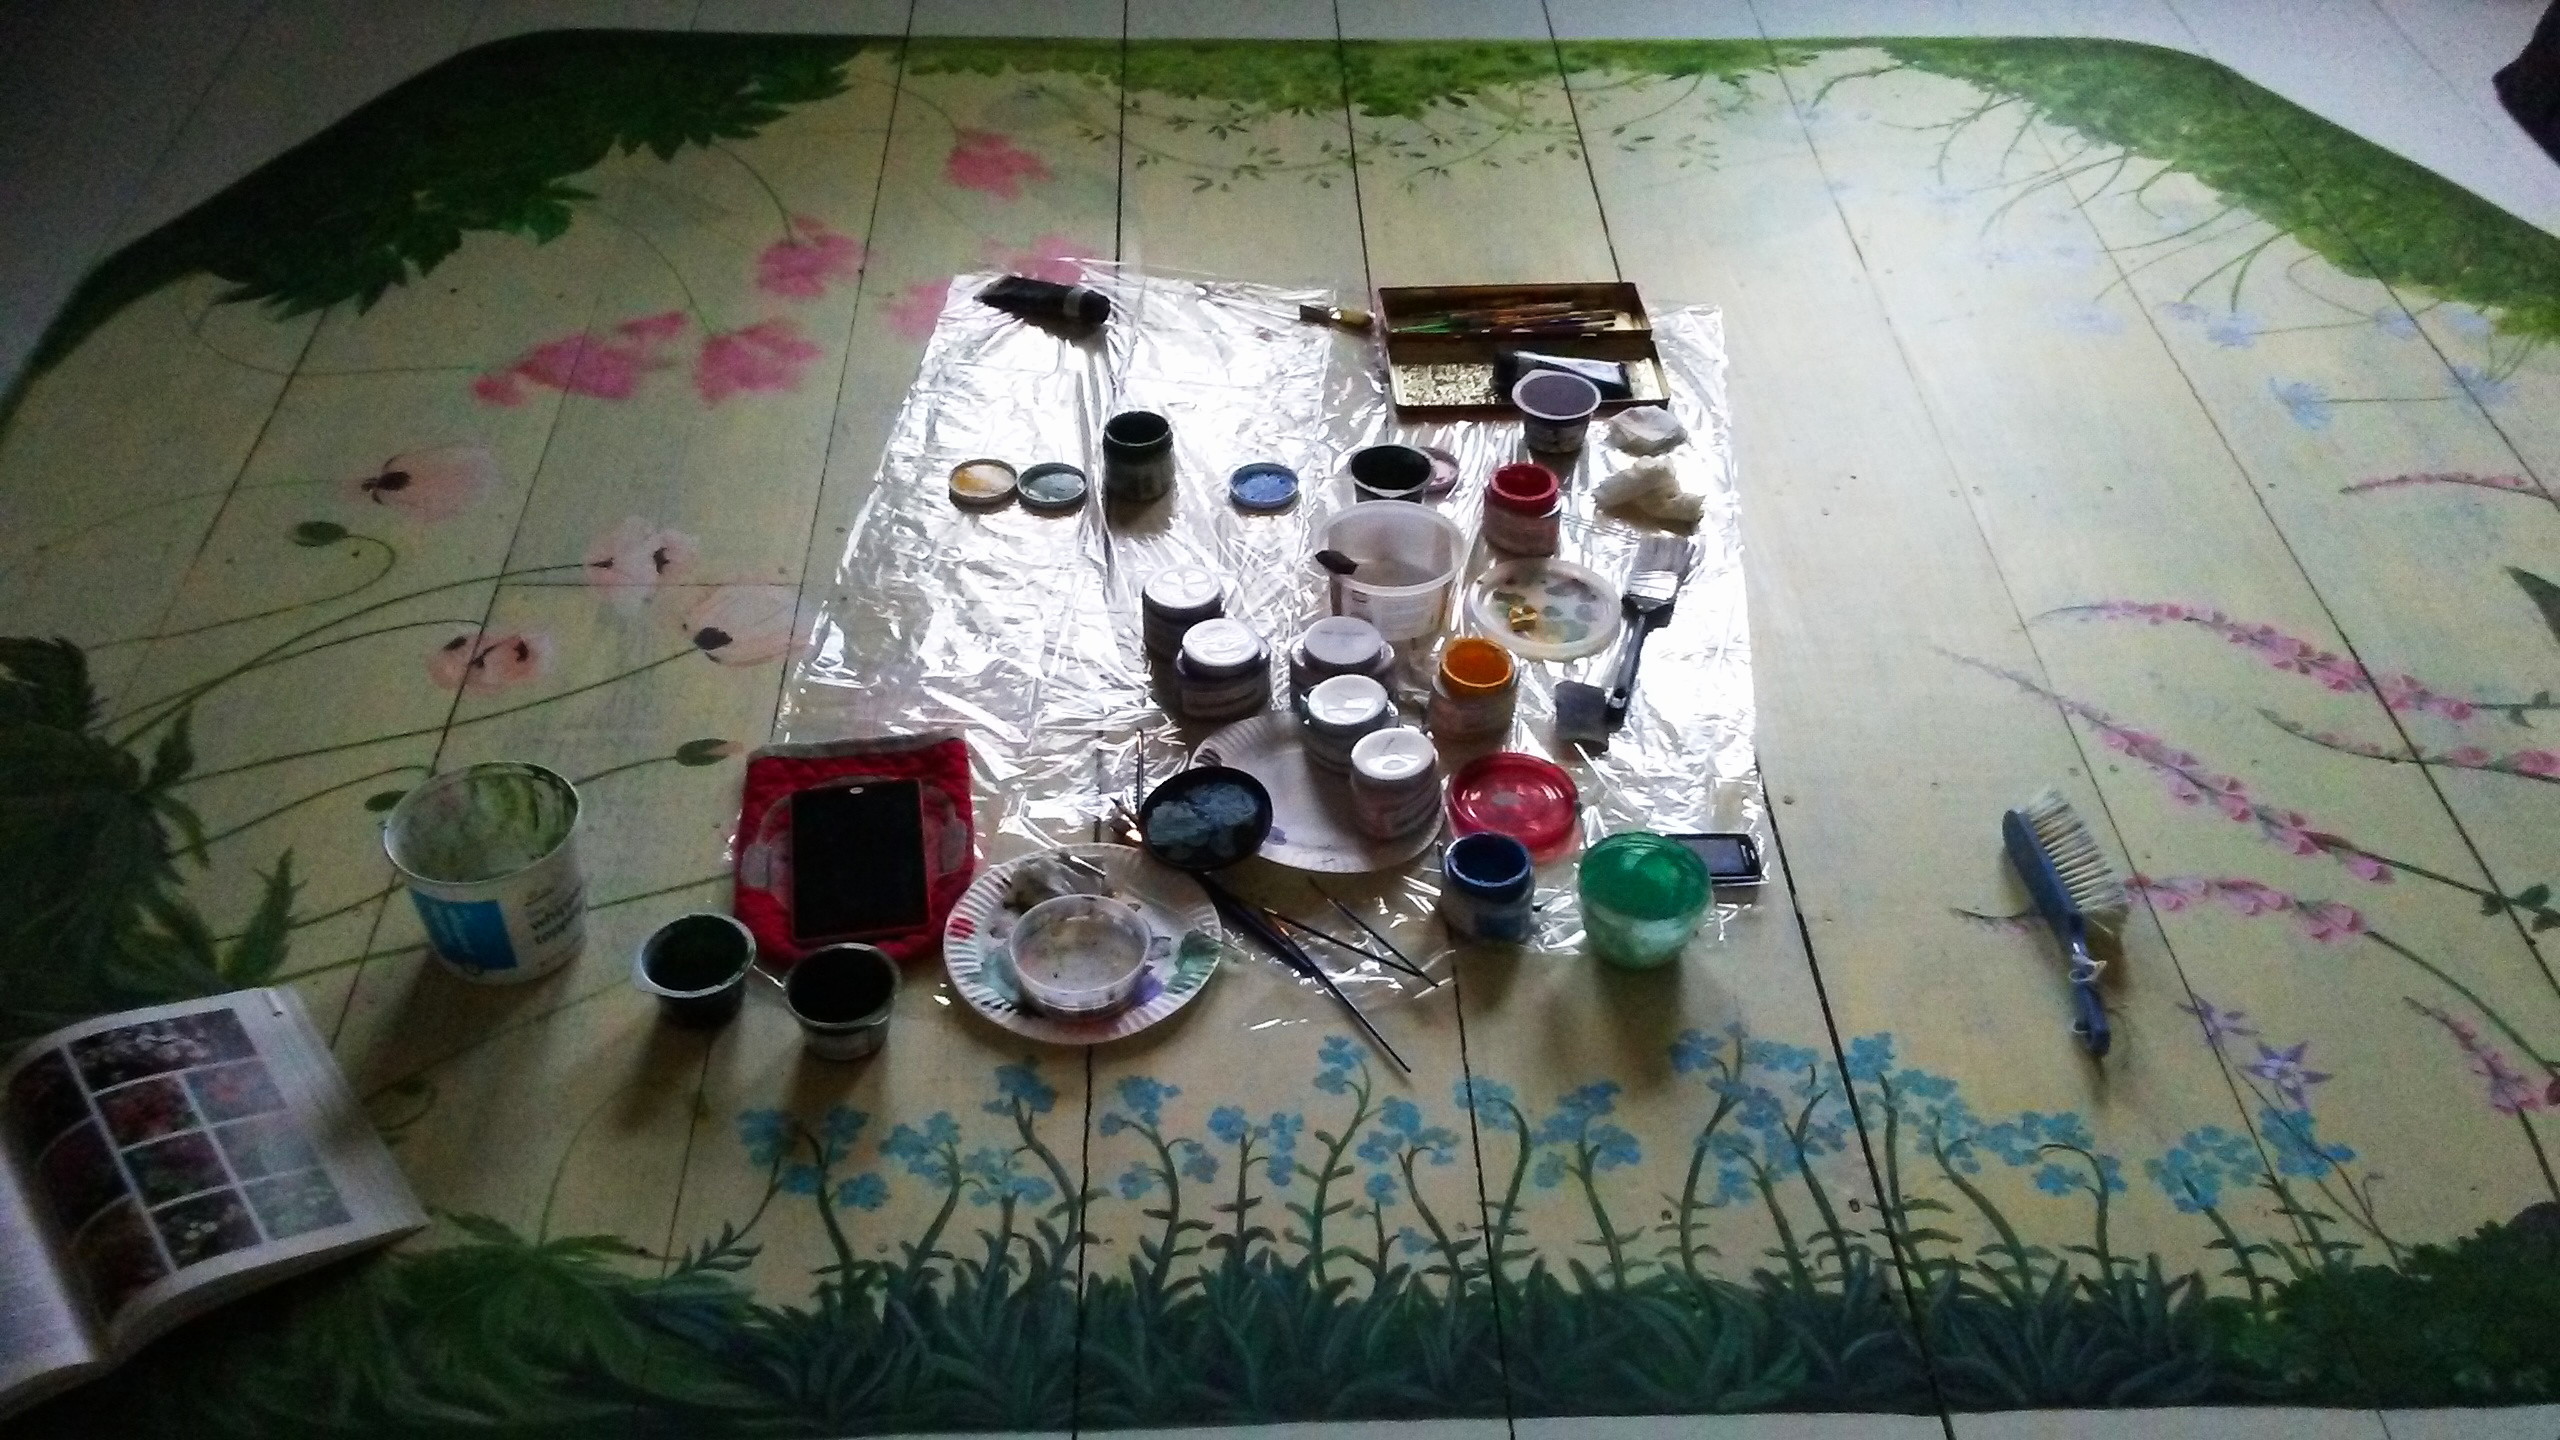 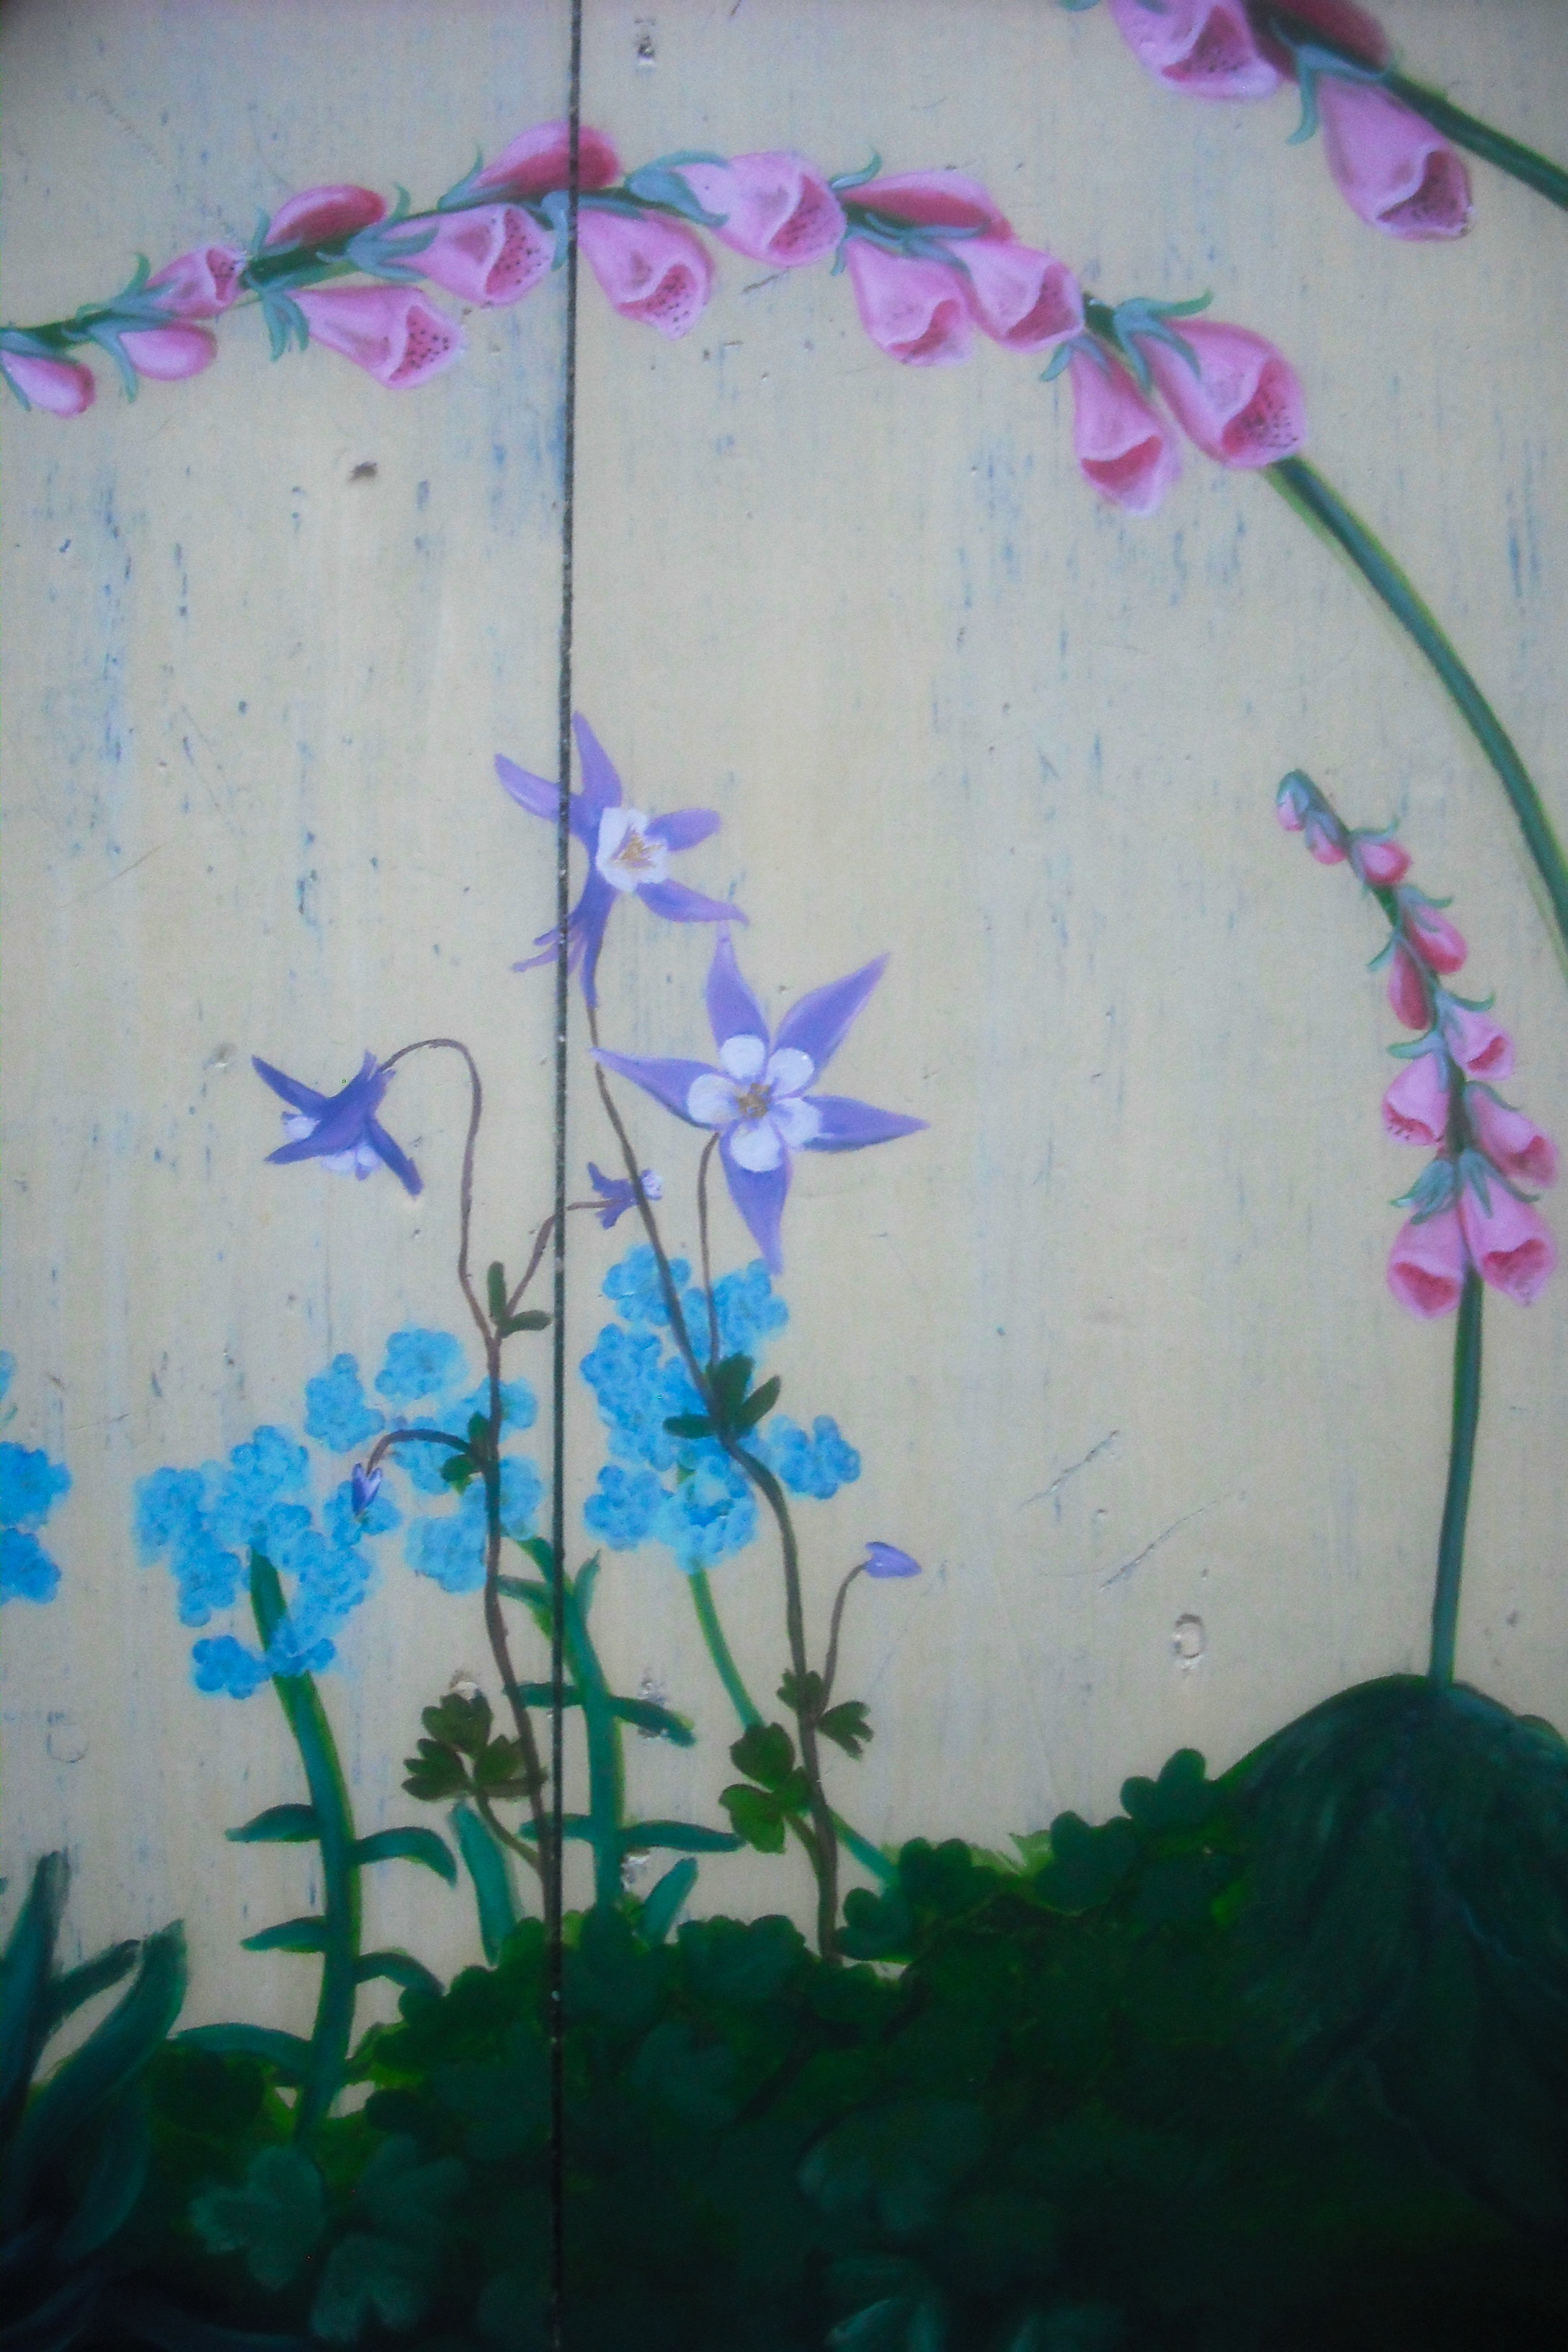 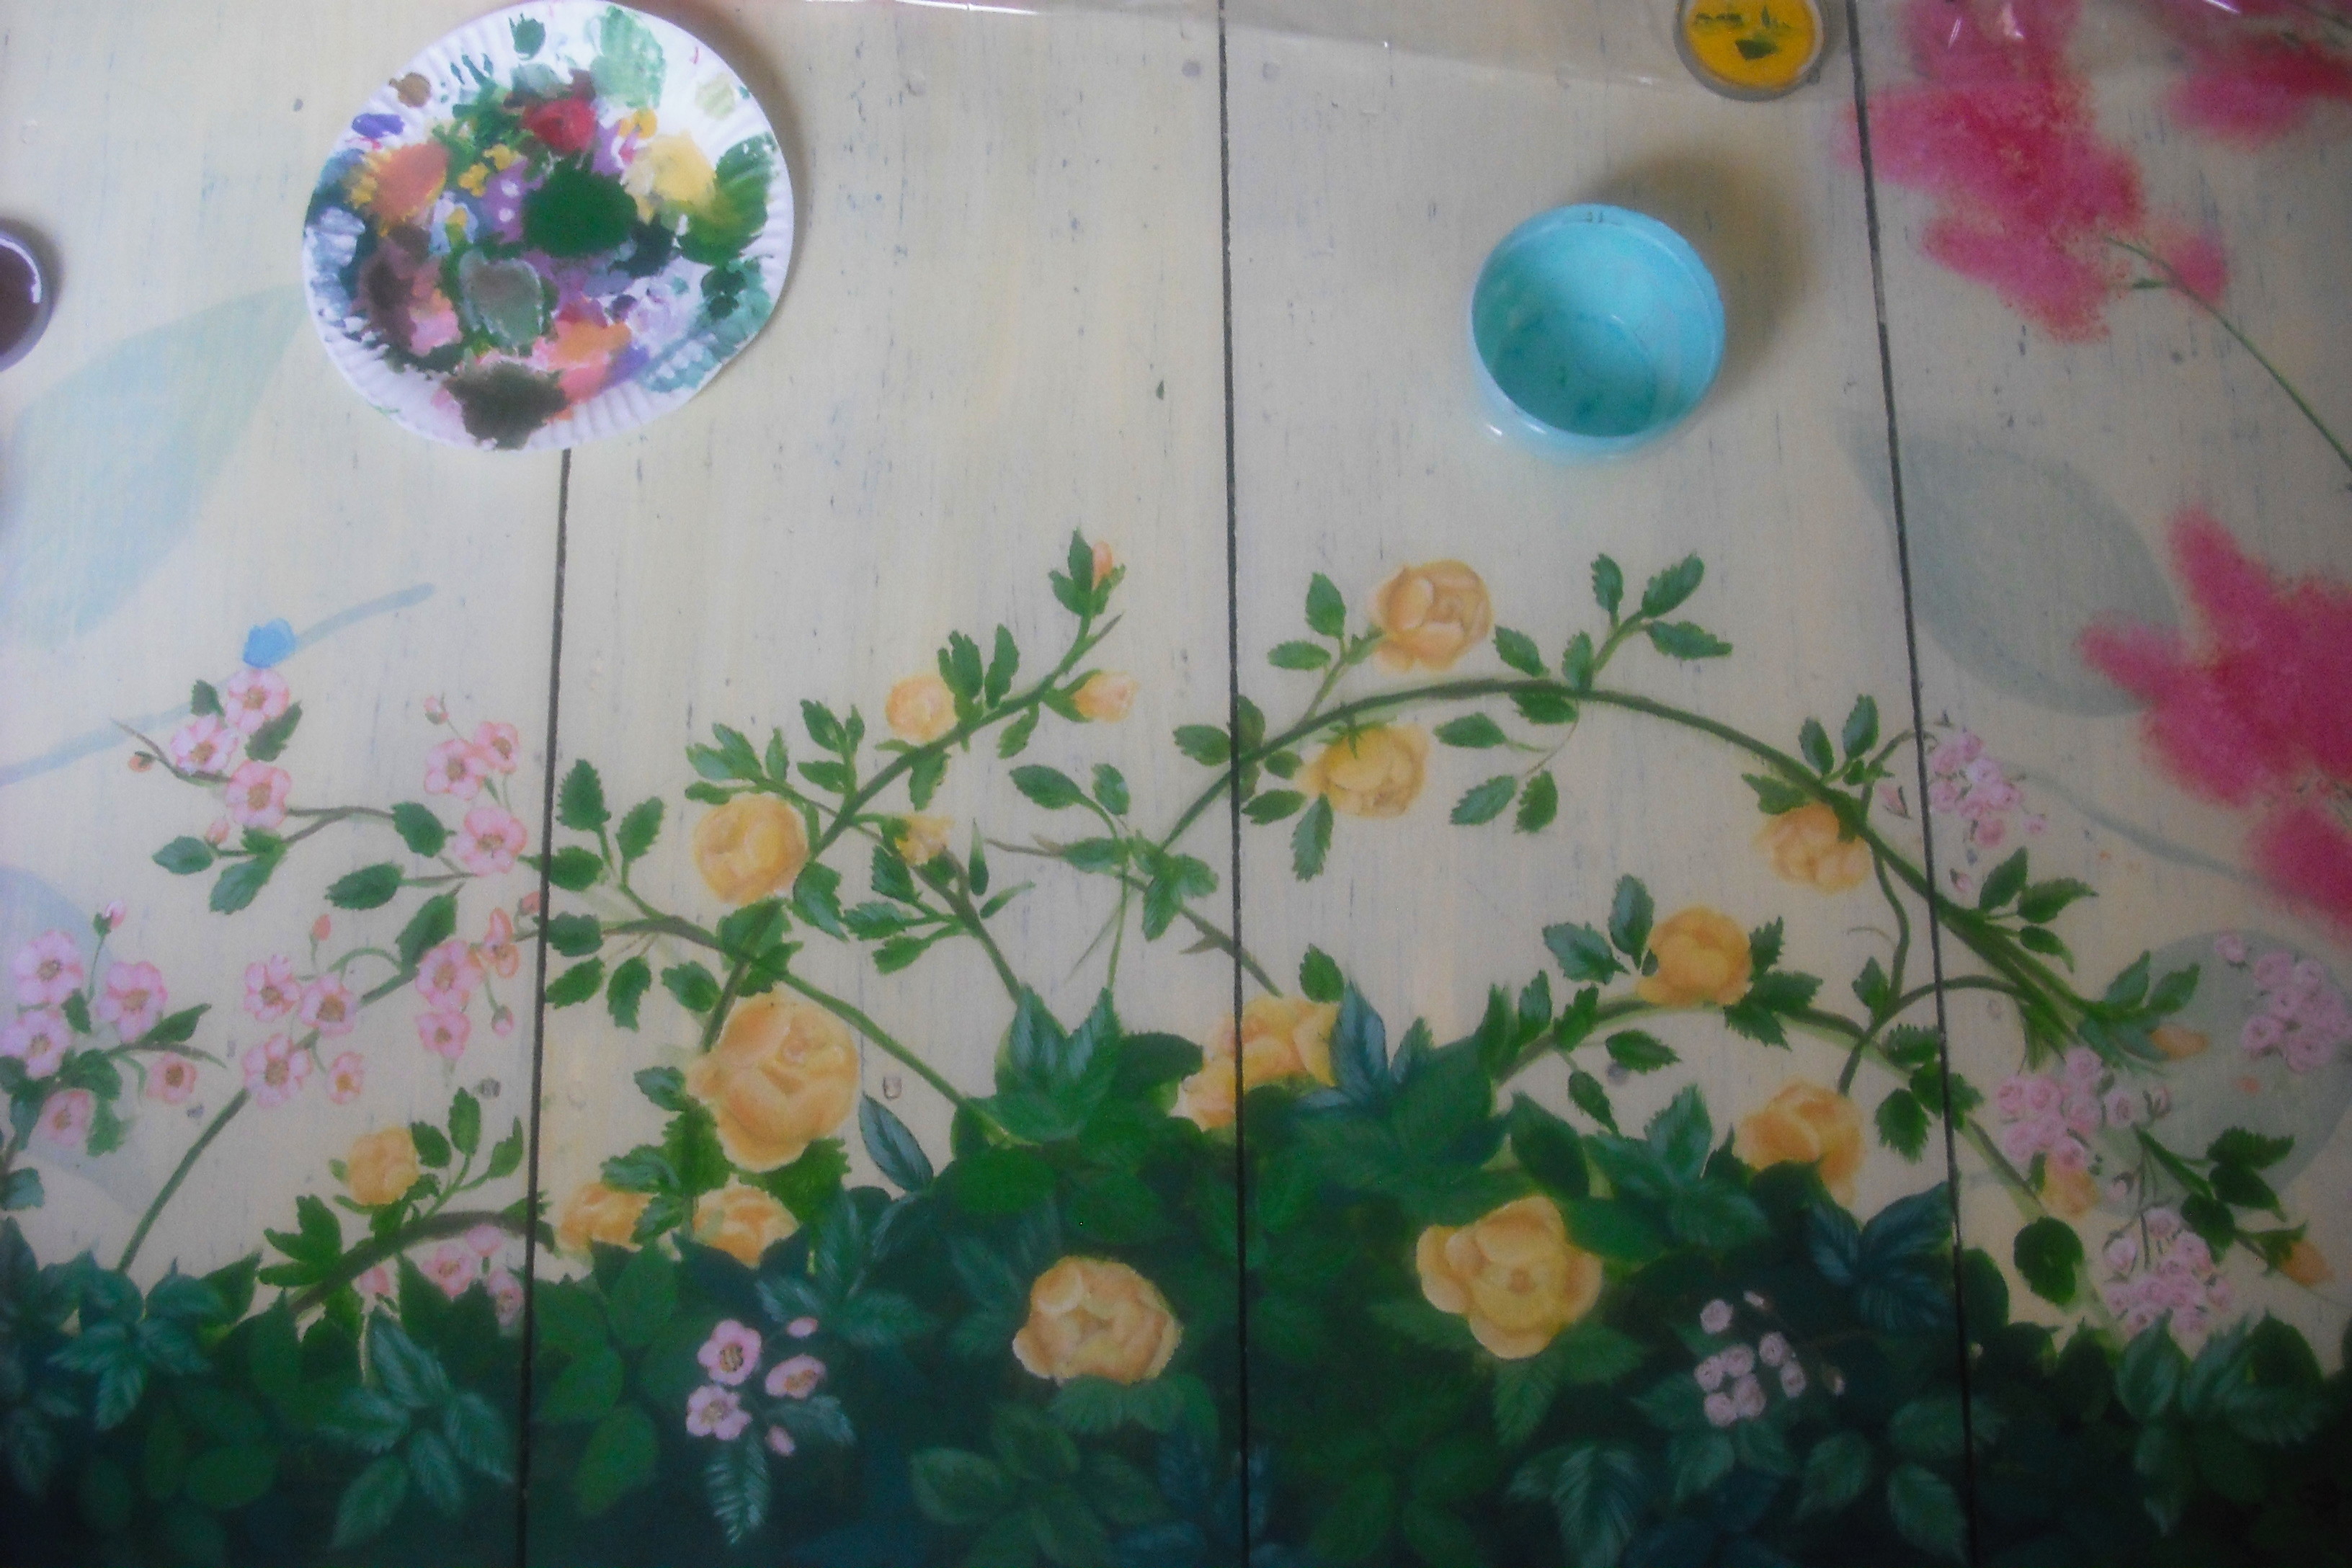 Painting a border around the entire mural is one of the final steps. I had considered using a stencil, but since the entire piece has been hand-painted in a loose style I thought a stencilled border might look too prim. However, before tackling the border cold I painted a test section on clear plastic and lay it over various sections. It helped me visualize the effect before actually painting the floor. When I did get going, I went with smaller brush strokes than in my test section. 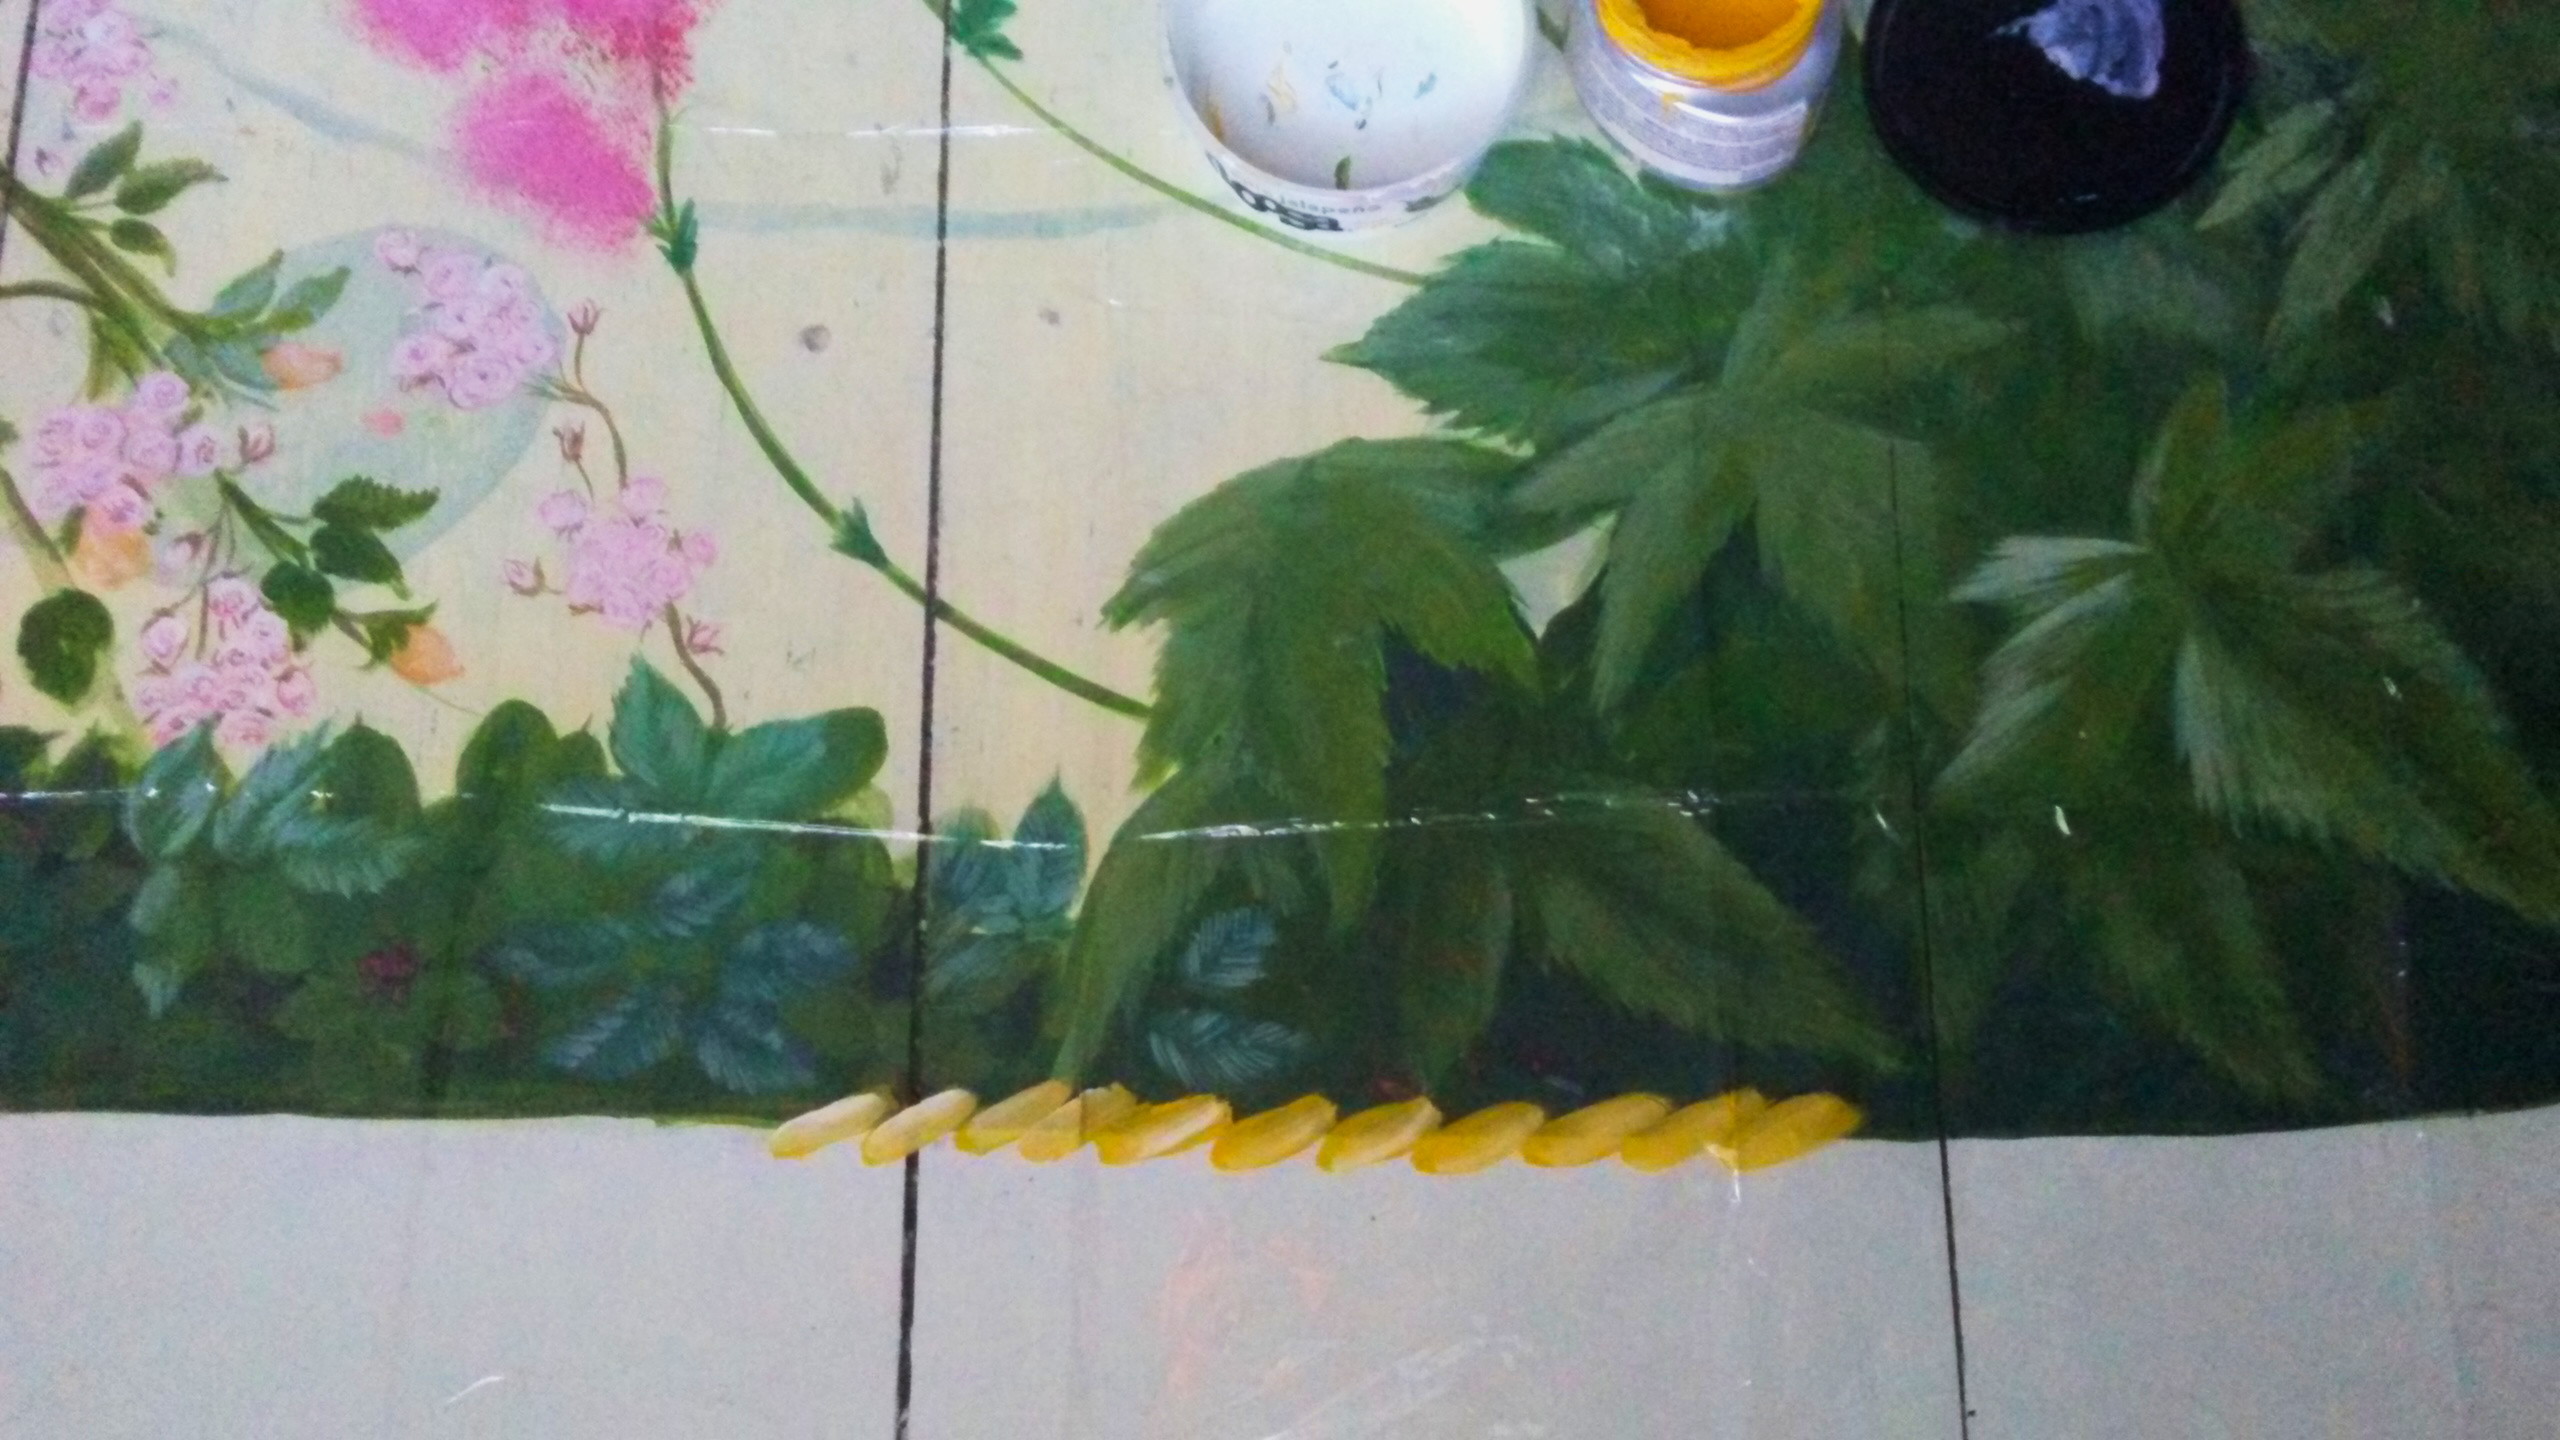 Border test painted on clear plastic. 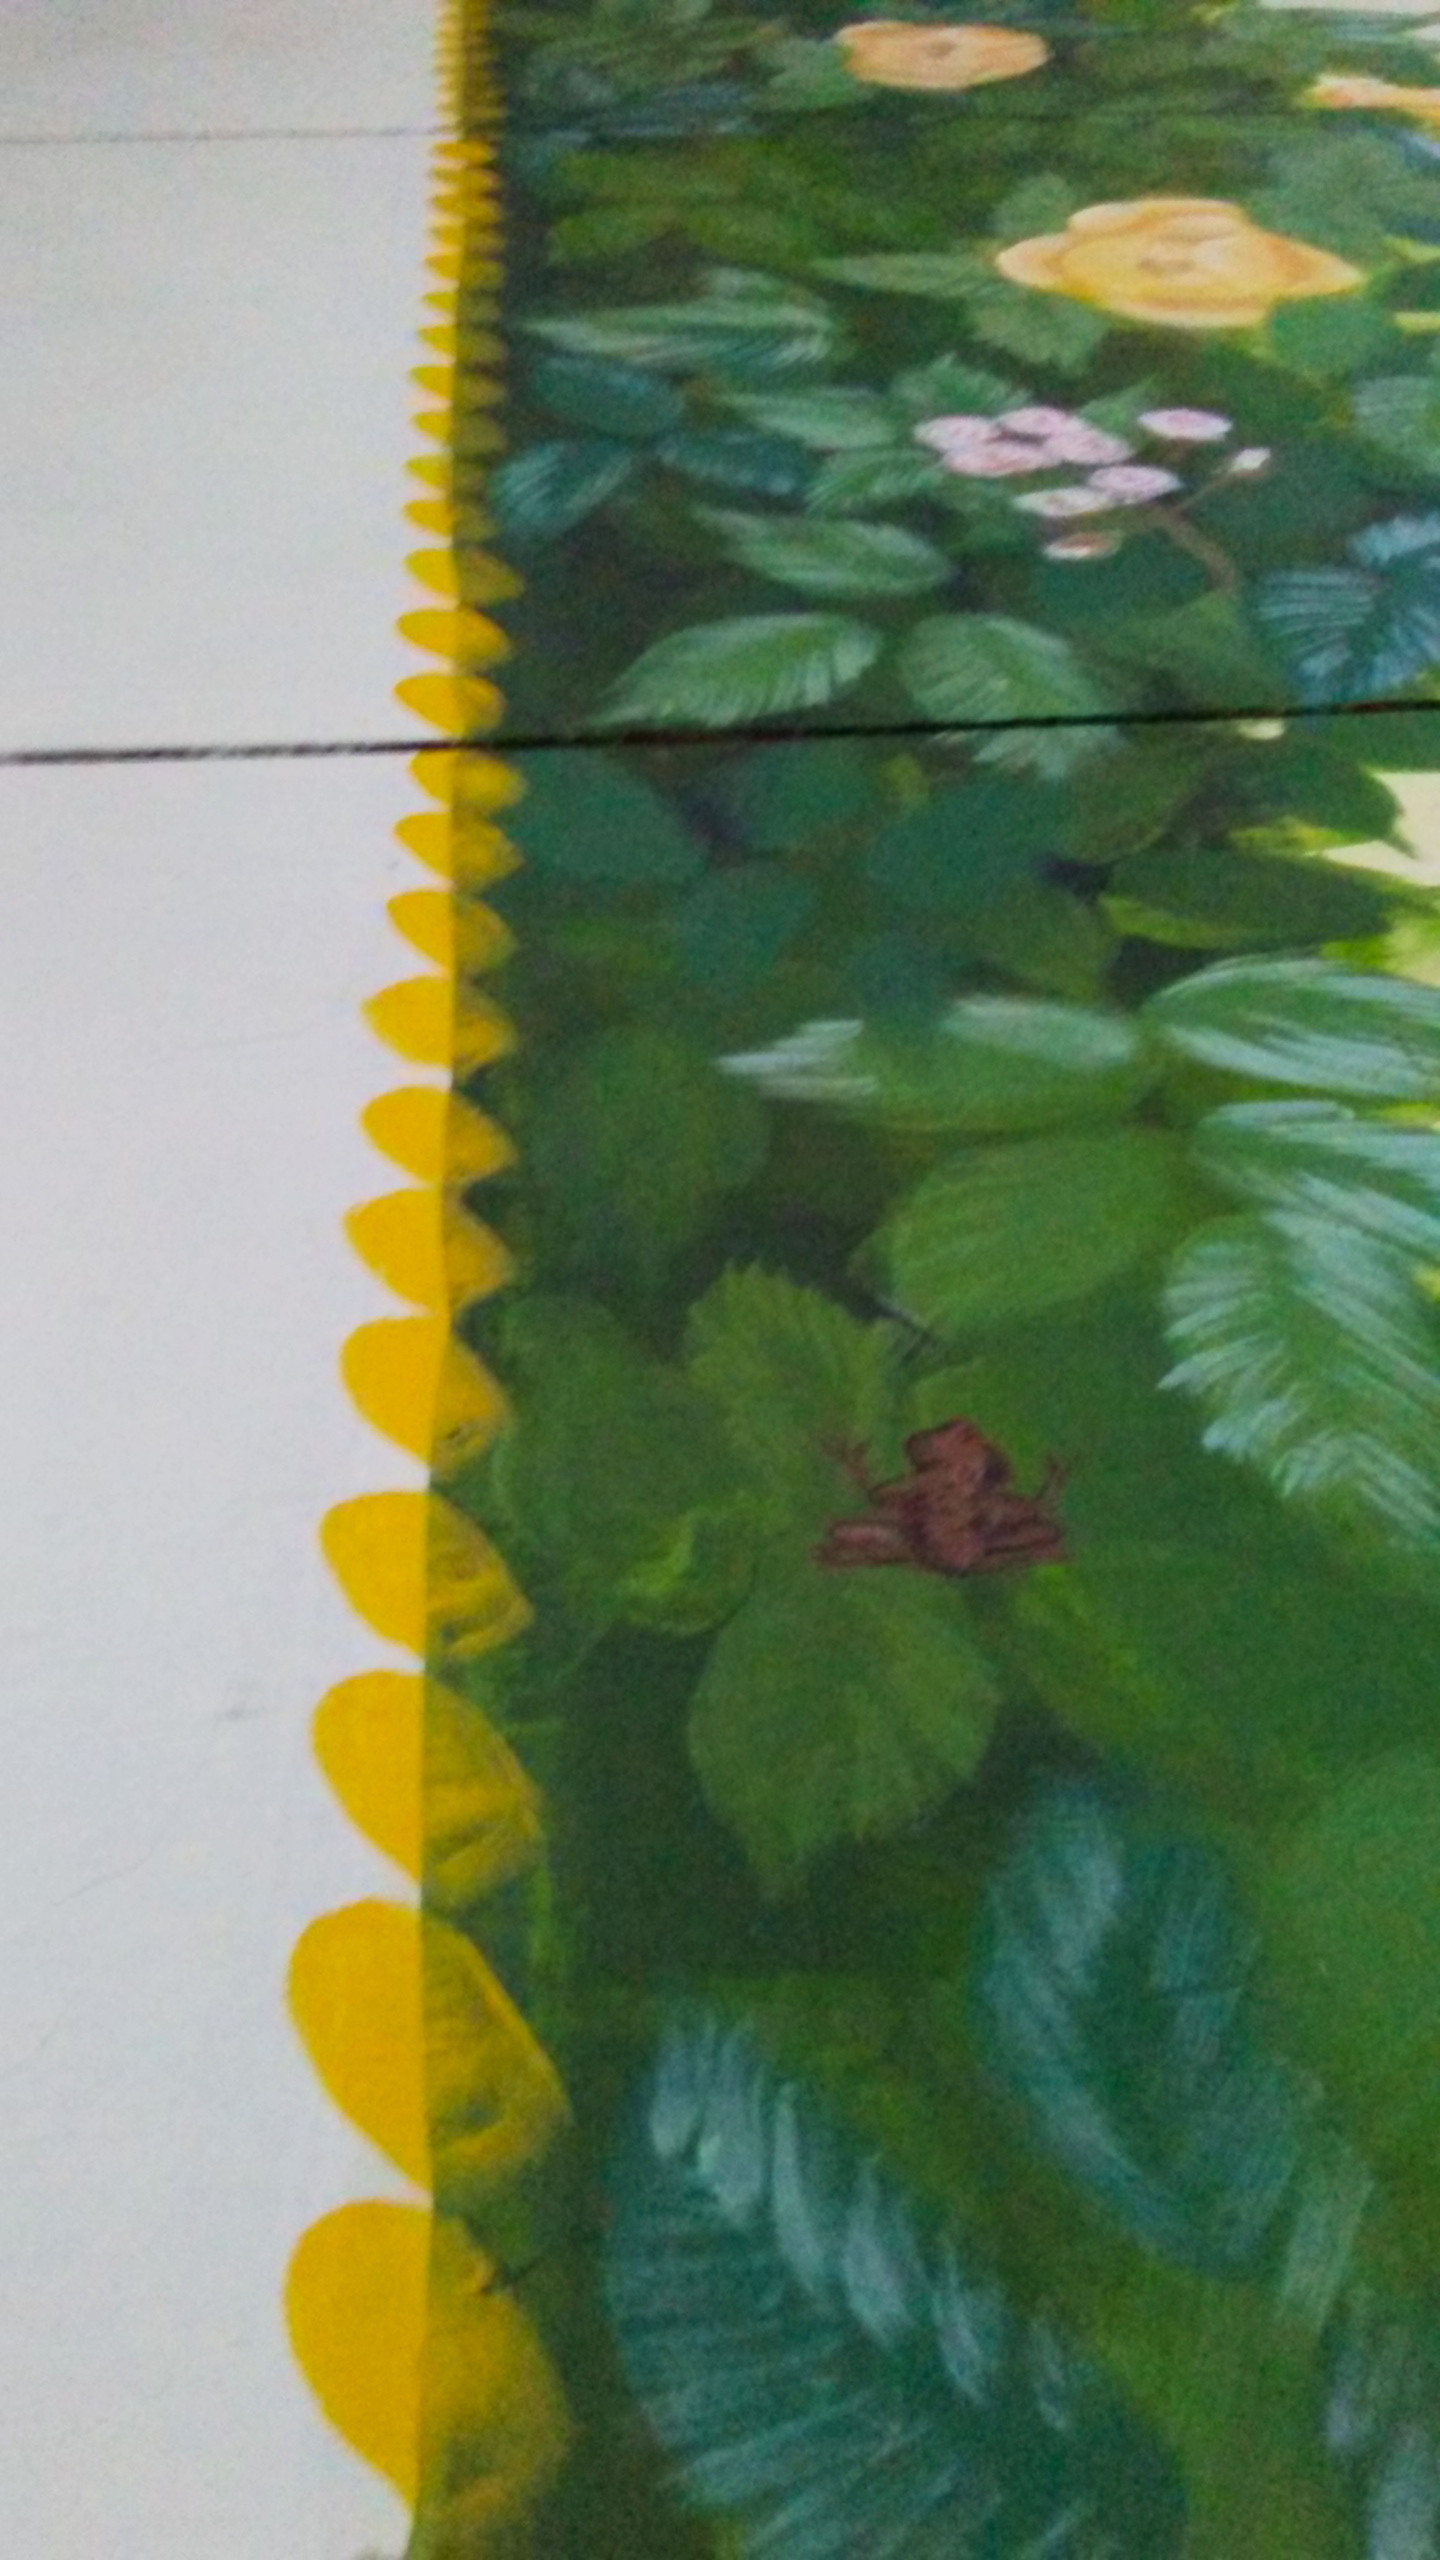 First coat of paint for the border. All there is left to do is finish the border and paint a couple of little snakes. After that is done I will wash the white floor and coat the entire space with two layers of clear Verathane in a satin finish.  Foxgloves and Poppies Before painting any flowers I had to prep the floor, starting by washing it twice with Simple Green, and sanding the entire "rug" area with a power sander. I wanted to remove only a little bit of the yellow to reveal more blue streaks while also roughening the entire surface. Then I swept the dust away and wiped the floor down with TSP Substitute. In a plastic cup I mixed a very watery batch of butter colored paint, using Gripper for the white and yellow latex paint. With a large brush I then coated the entire mural space, which served to spruce up the existing yellowy area and make a nice fresh surface for my flowers. 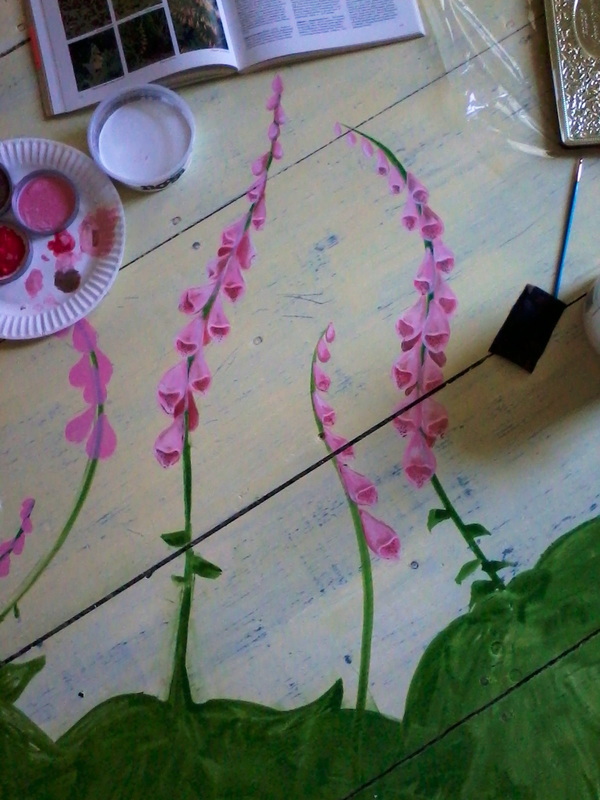 Started with a wash of green paint around the perimeter indicating the location of leaves for all of the different plants. For now, I've decided to focus on painting the flowers, and finish the leaves after. I will probably bop around, but that is how I'm starting. 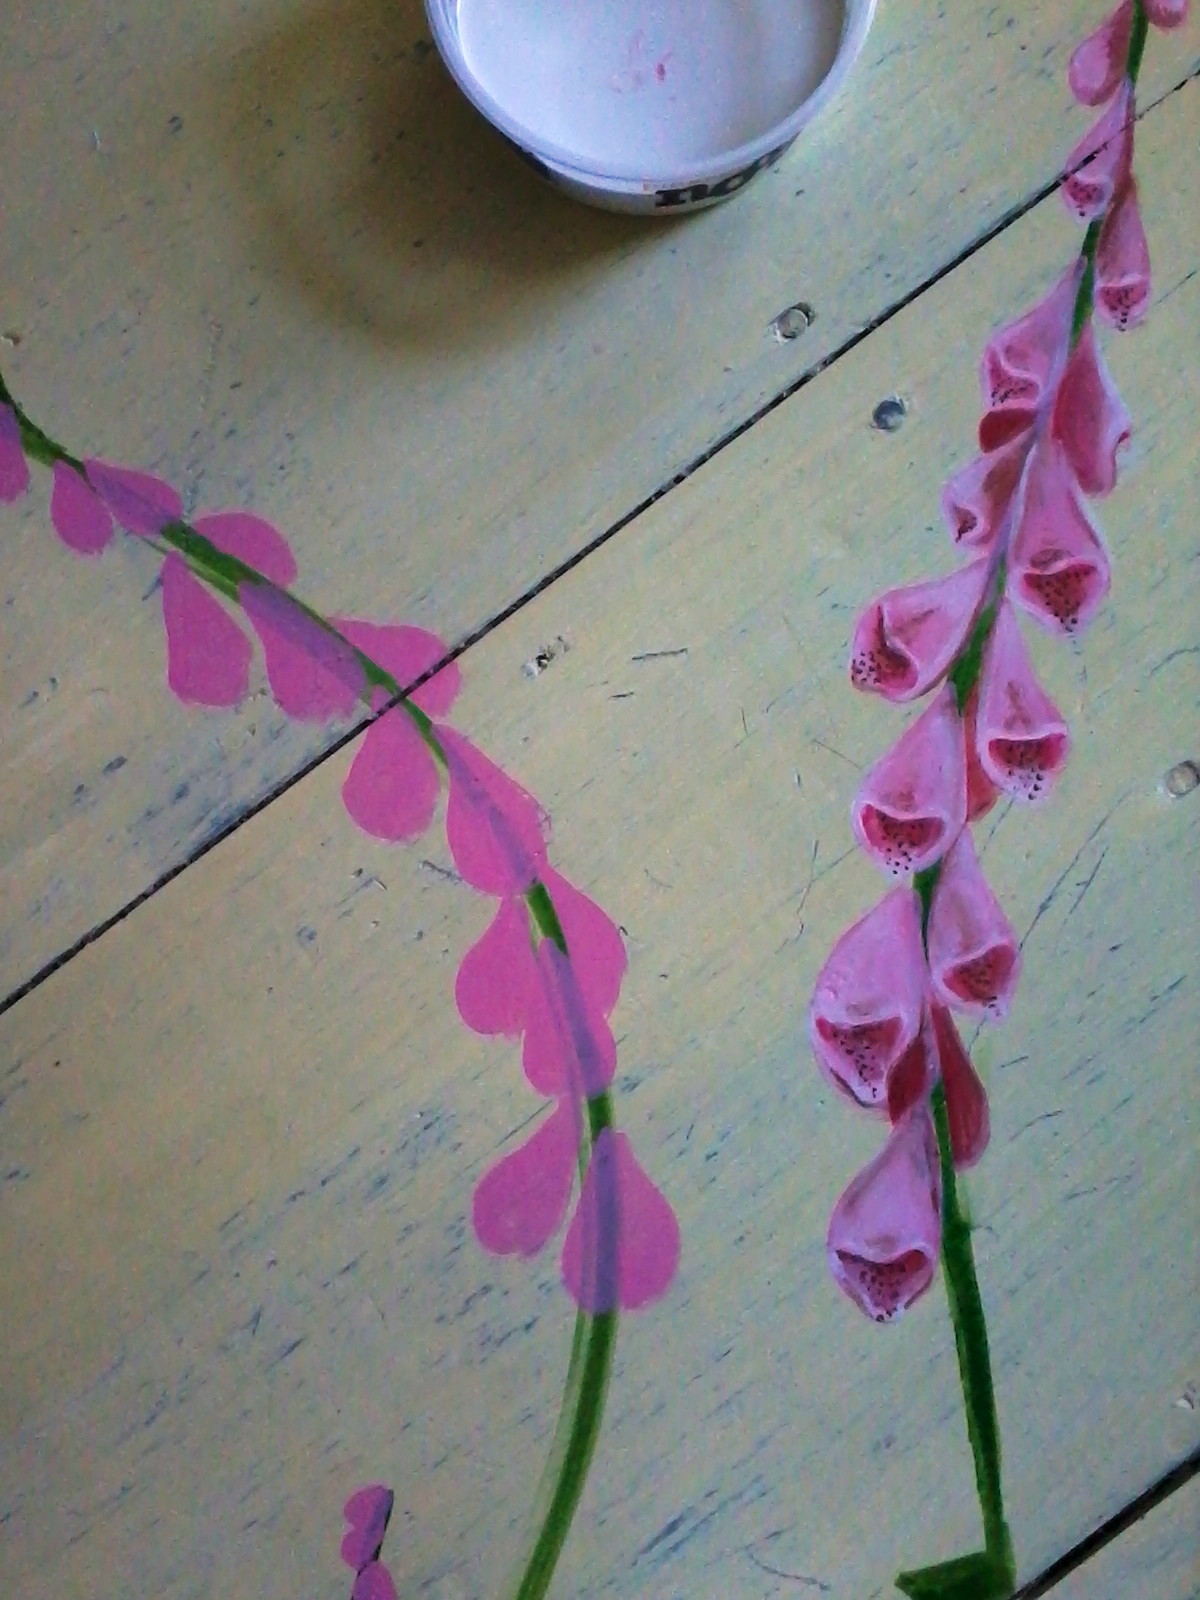 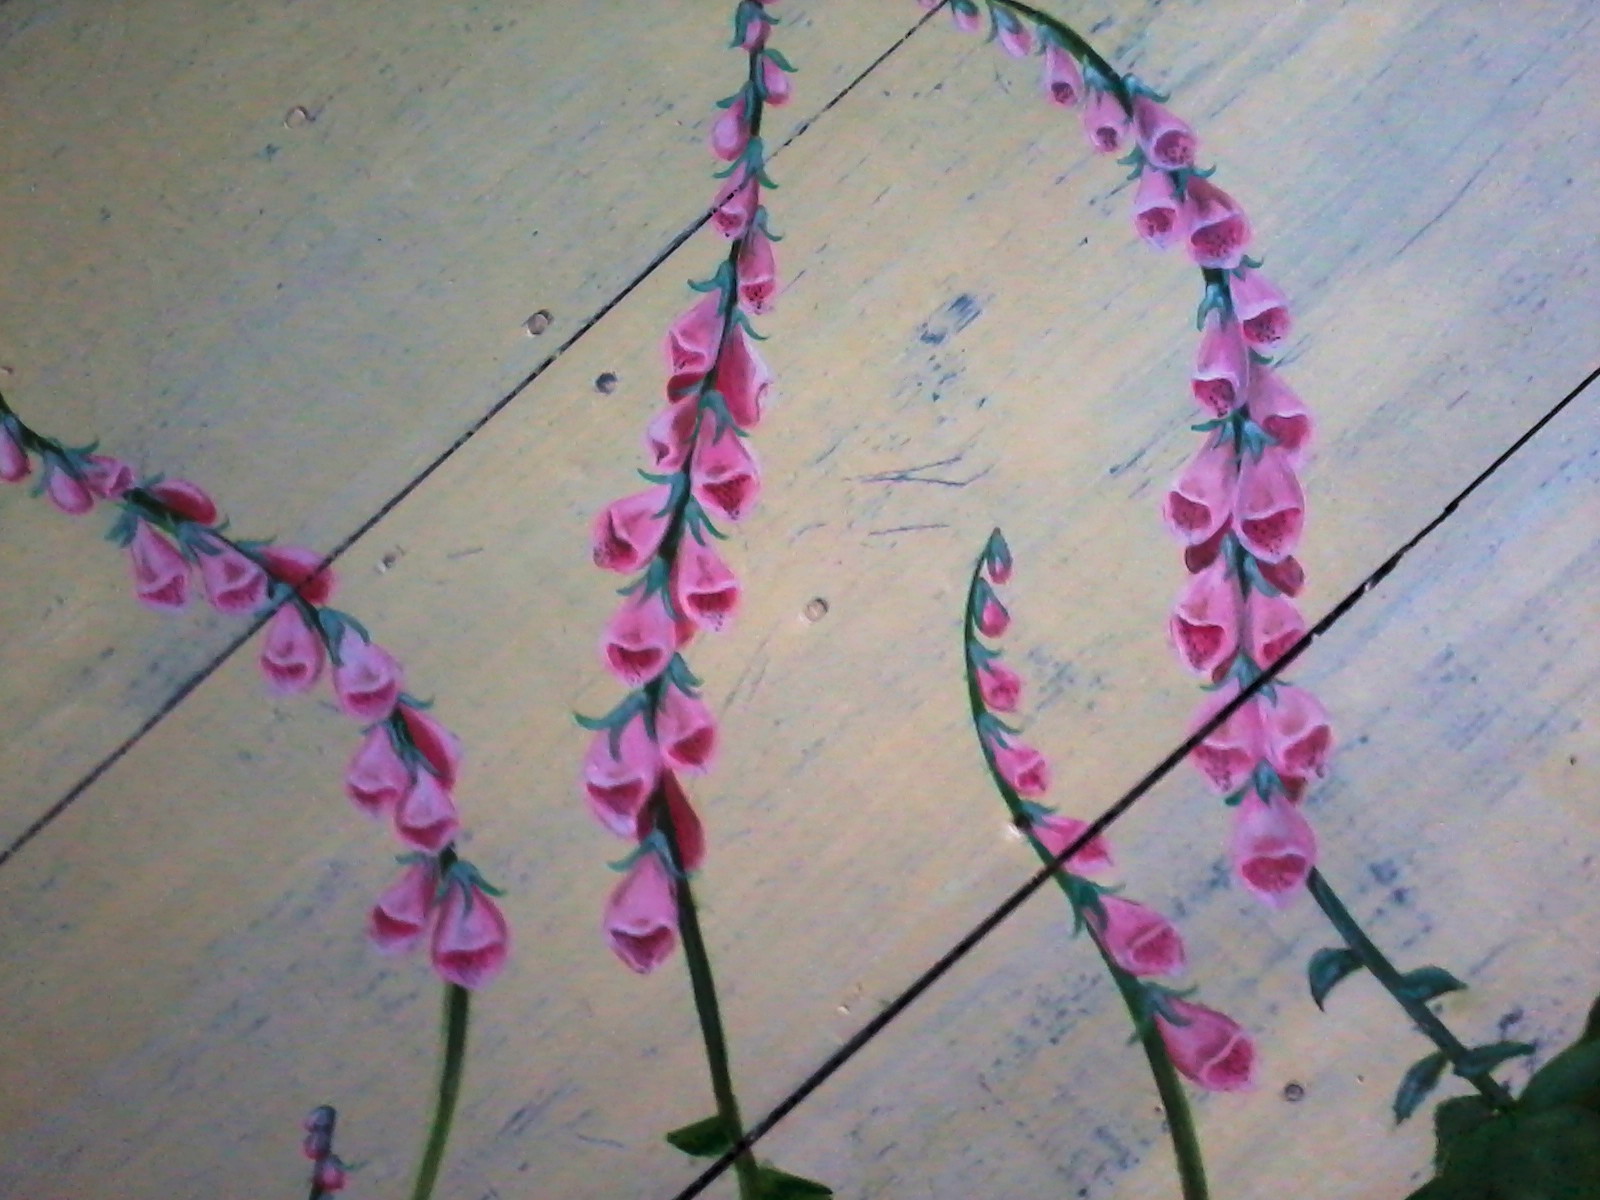 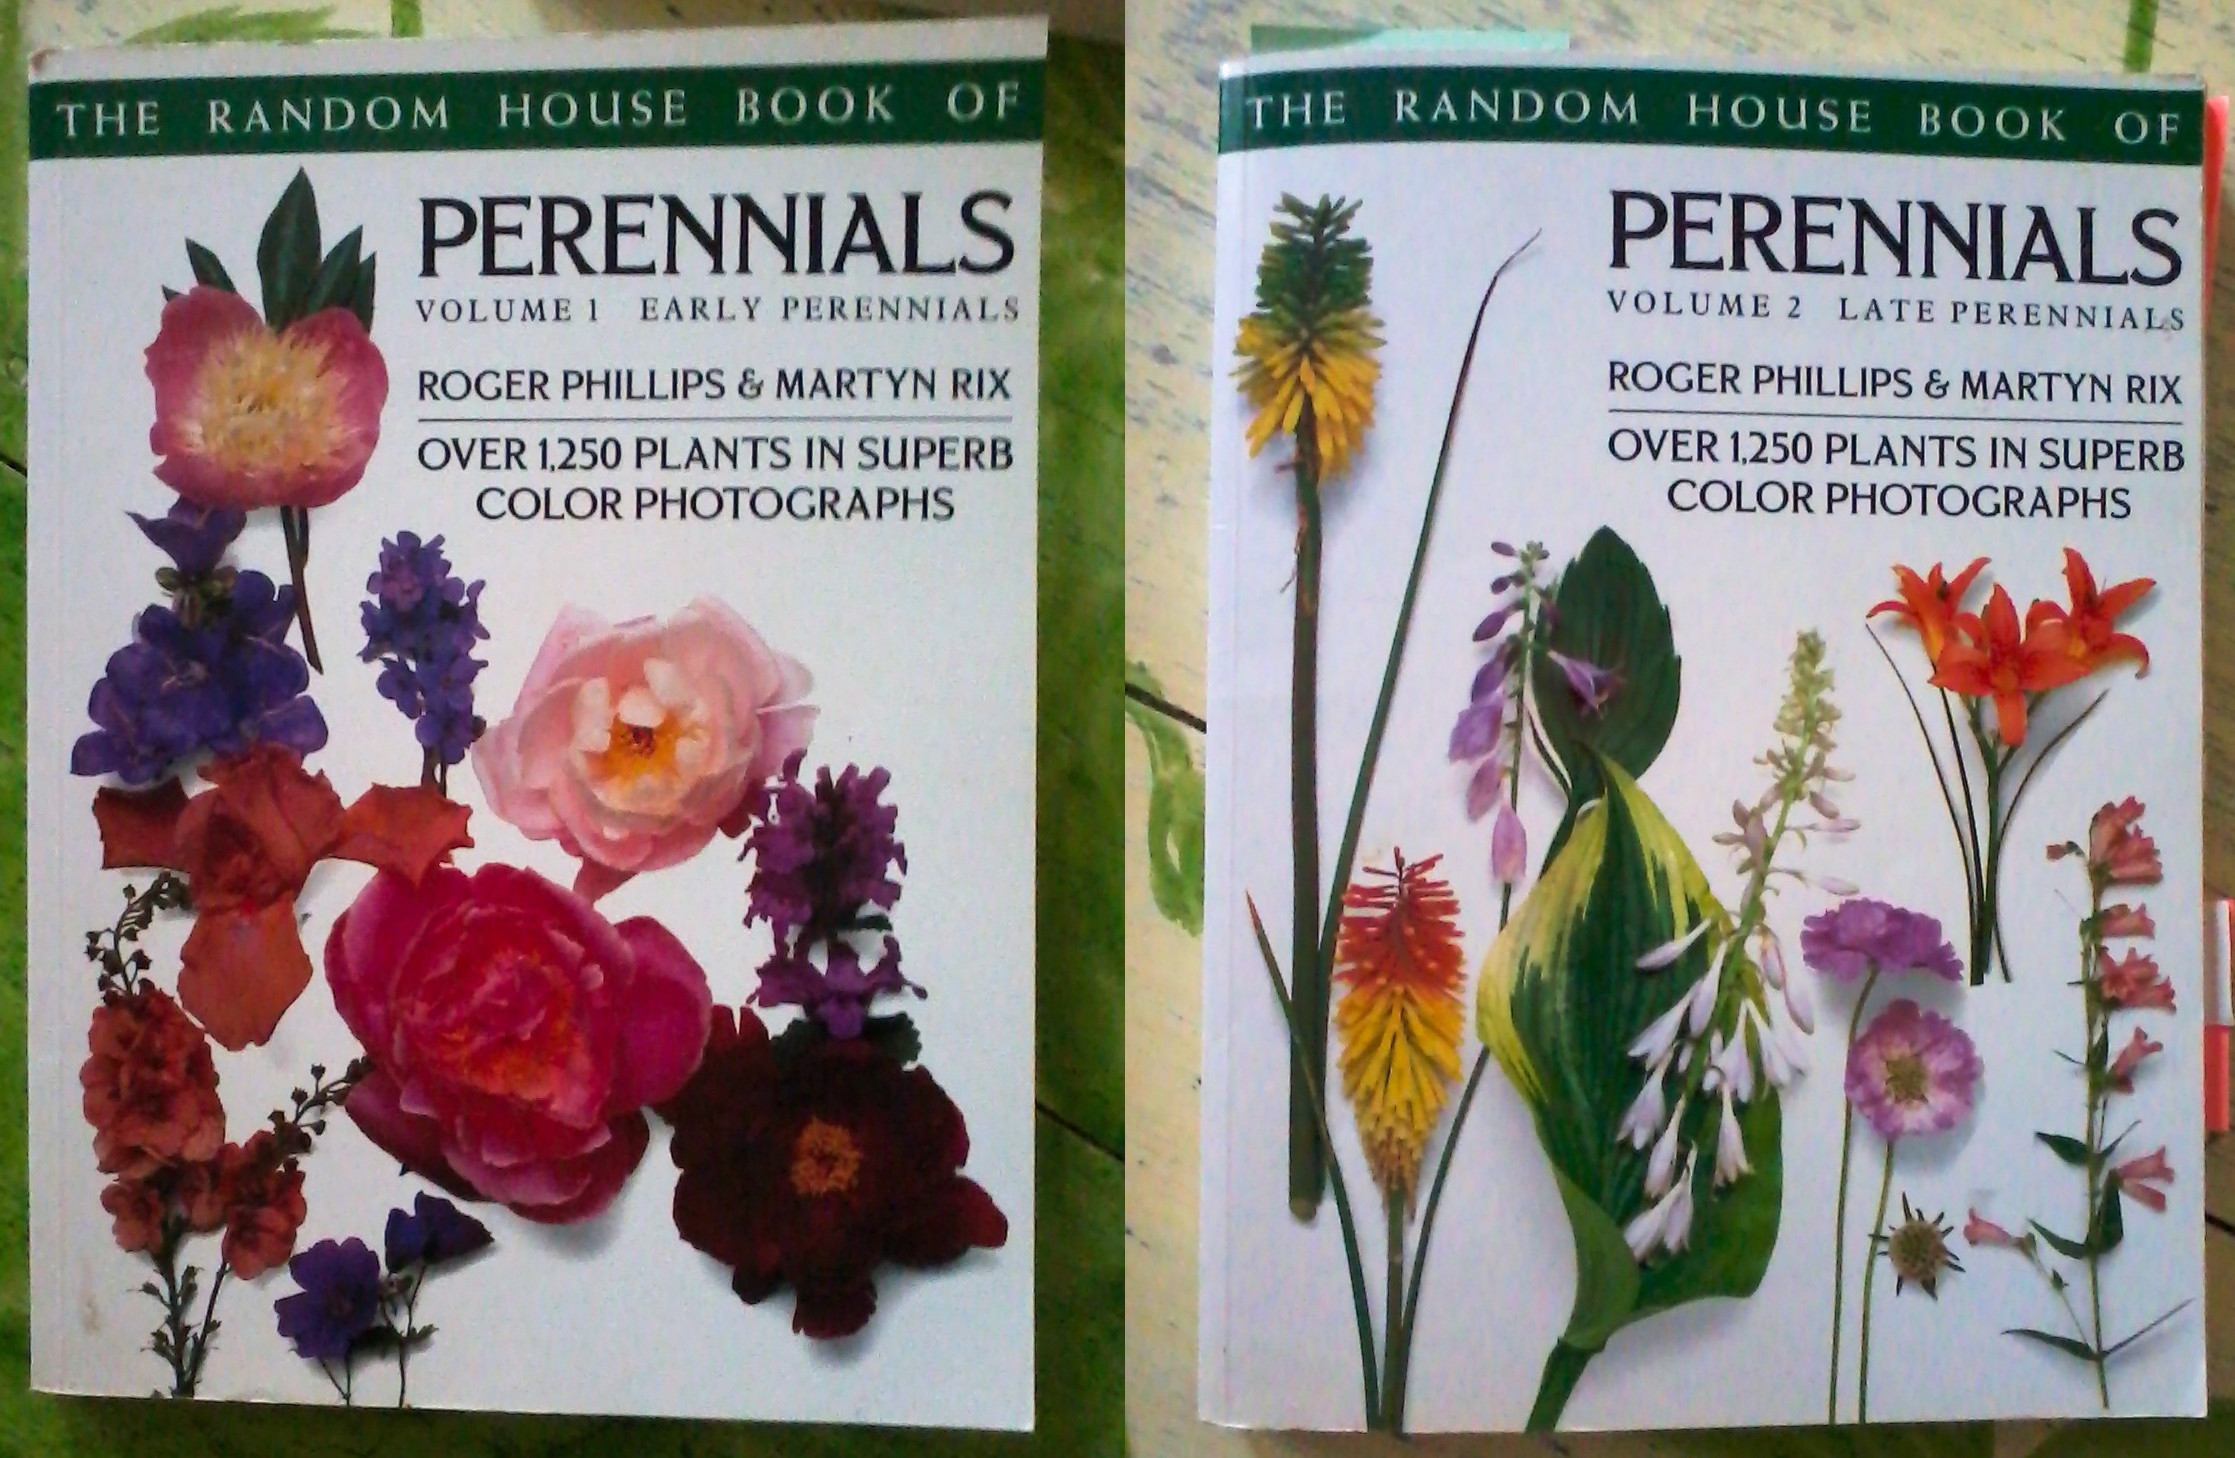 For reference I am using volumes I and II of The Random House Book of Perennials. They have great photos of the plants in their environment, and also specimen pages where the focus is on the flower heads and all their varieties. 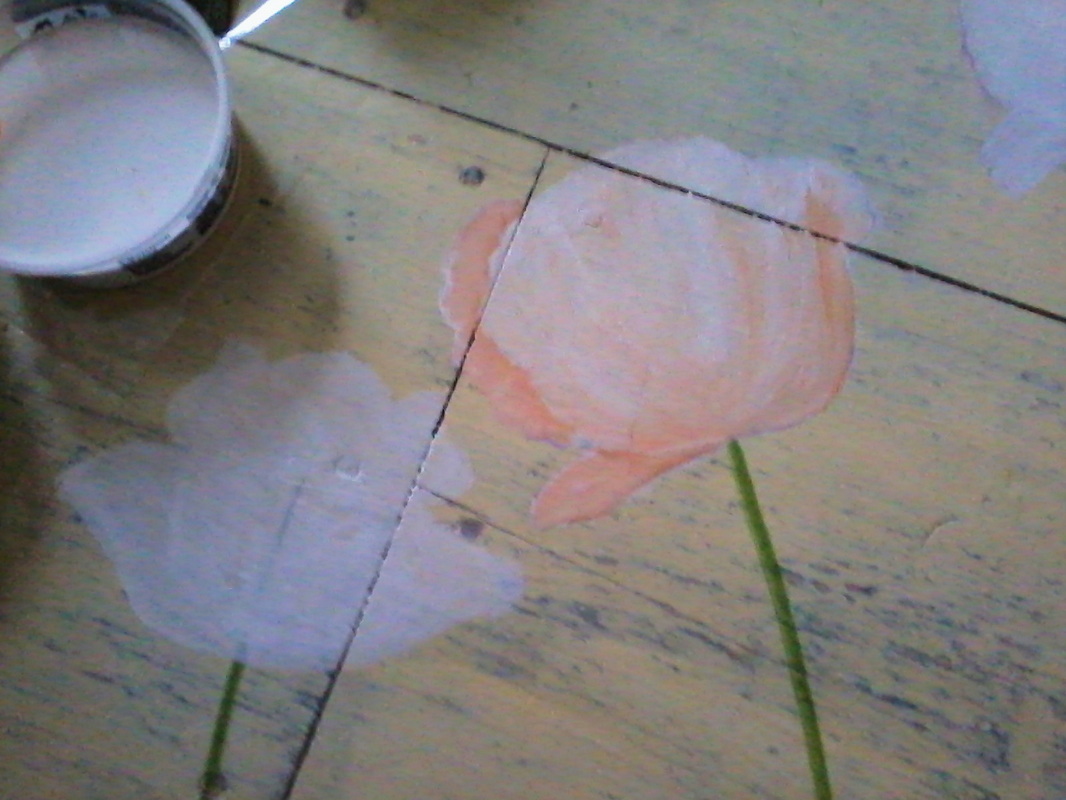 Poppies in progress. As much as I love a fiery orange oriental poppy, I will be restraining myself and my palette on this project.  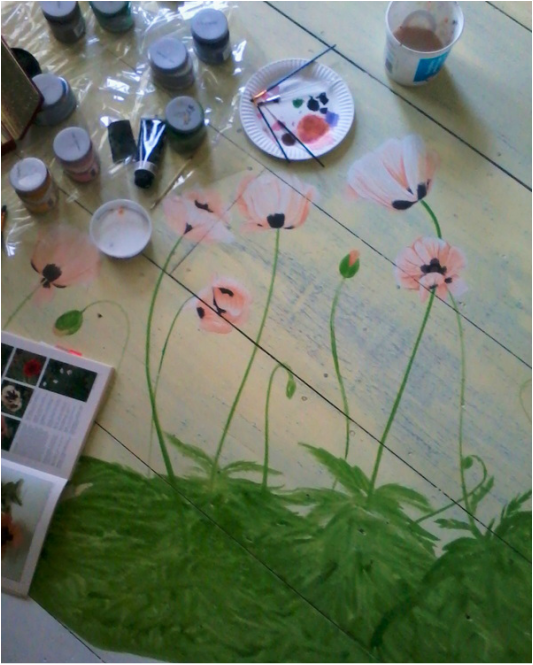  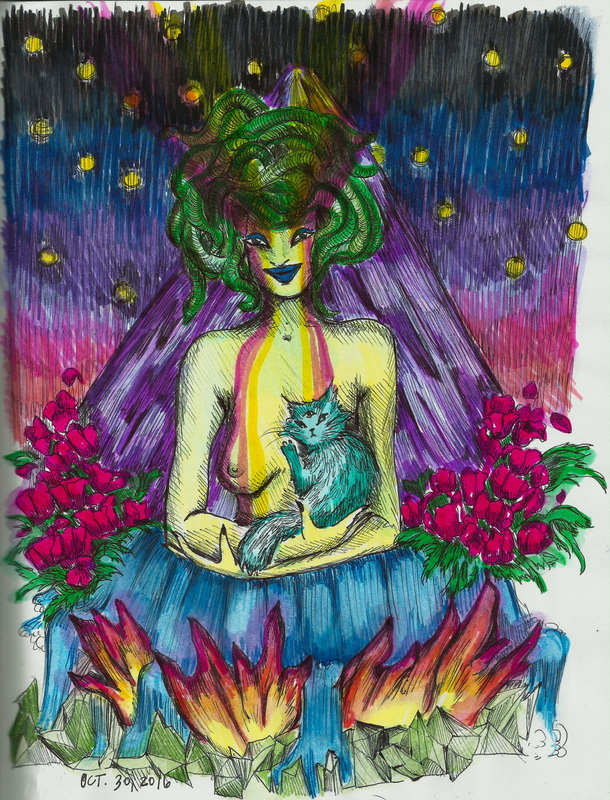 Tombow markers, Winsor & Newton watercolor markers, Inkjoy ballpoint pen. Medusa and child, Sun sets over crystal fire. Subtle, I am not. 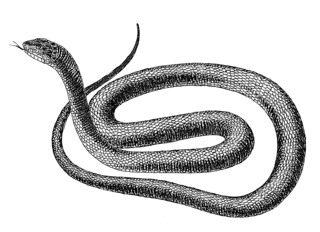 |