Pentel Arts Fabric Fun Pastel Dye Sticks, 15 color set
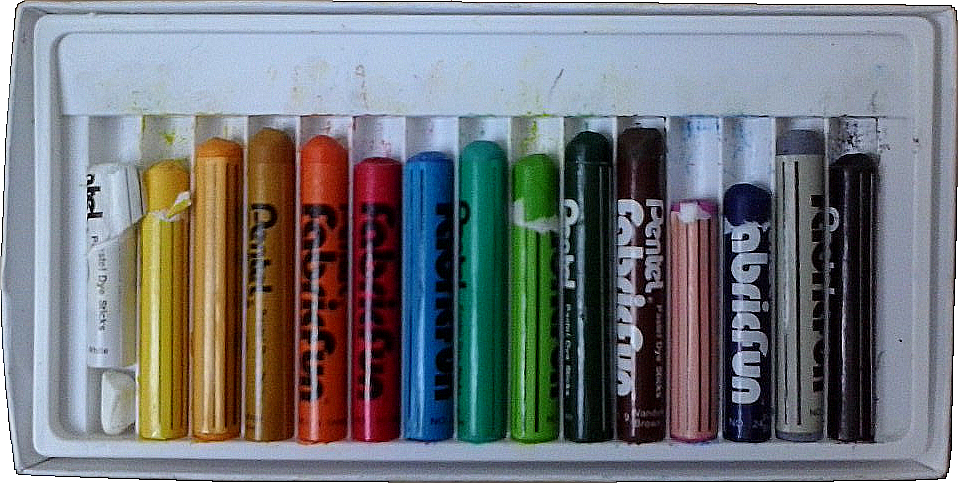
On a whim, I purchased a set on Amazon for $3.50. They look and feel like oil pastels. The process is pretty straightforward: draw as much as you want on the garment or fabric of your choice. When finished place a piece of paper over your art and heat set with a regular household iron.
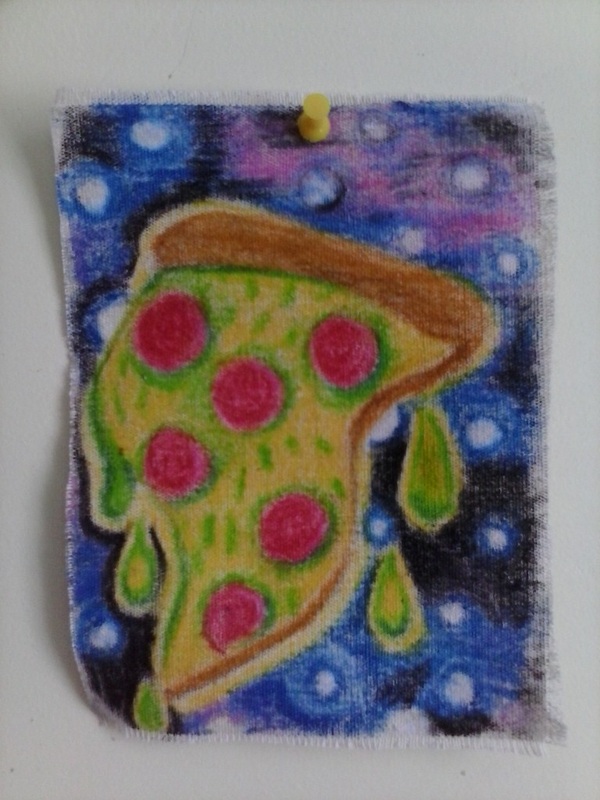
Space Pizza
I cut up some drop-cloth canvas for my test pieces. The rough material was good for "catching" the pigment and I was able to lay in on quite thickly. It was a little difficult to draw when the fabric shifted around, though I imagine working on a material with stretch (like a t-shirt) would have been harder. I am really glad a white pastel was included because I used it more than I expected.
Through a bit of trial and error this was the process I liked the best:
1. I used a large sketchbook as the work surface. It has a fake leather cover which is slightly softer than working directly on a table.
2. Using light strokes I lay down a field of color then used the rounded end of a paintbrush handle to grind the color into the fabric. This is called burnishing.
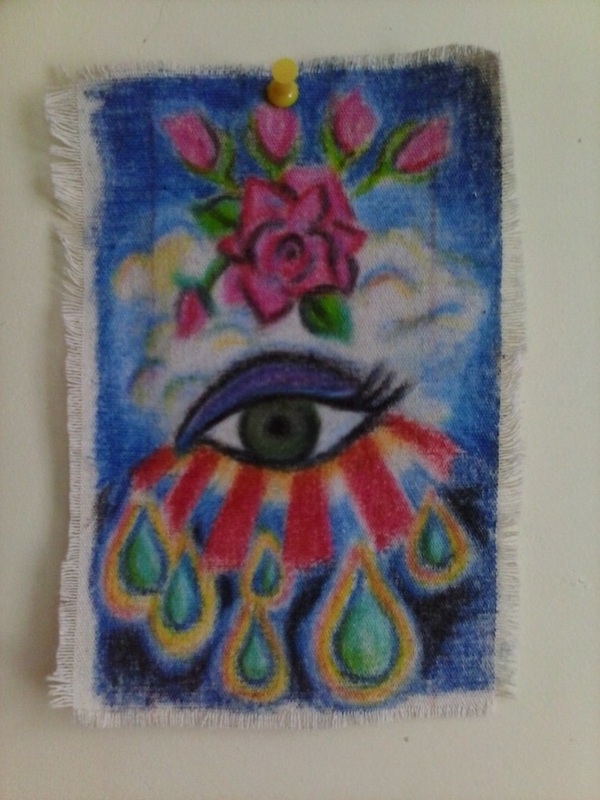
3. The burnishing was also very effective for blending the pastels and creating shading, like around the green drops in the eyeball picture, and the pearls on the collar.
1. I used a large sketchbook as the work surface. It has a fake leather cover which is slightly softer than working directly on a table.
2. Using light strokes I lay down a field of color then used the rounded end of a paintbrush handle to grind the color into the fabric. This is called burnishing.
3. The burnishing was also very effective for blending the pastels and creating shading, like around the green drops in the eyeball picture, and the pearls on the collar.
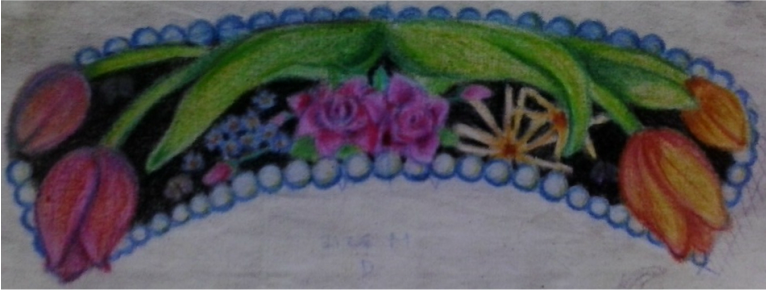
Unfinished peter pan style collar
There was only one major negative: I could not find a way to sketch out any images without the sketch lines showing through the pastels. Setting the art with an iron soaks the pigment into the fabric and the image pales. This is most obvious in the eyeball art: the two vertical lines running through the picture are a remnant of a previous drawing. On the collar I thought I learned my lesson and used a very pale colored pencil to draw the outline. Again, the lines are visible, just not as much. I made no sketch for the space pizza, so no lines!
Next time I use these pastels and have a specific image in mind I will try to draw my design on paper, set it on a light table and sketch with the pastels directly on the fabric.
Overall, I really liked this product. I rarely draw with chalk or oil pastel, so this pushed me to experiment with a medium I am not very familiar with. They were inexpensive and easy to use, and now I have some funky patches.
Have fun!
UPDATE: If you want to see some detail photos of my process using these pastels, jump over to my Strawberry Jamm post.
