Cheap & Awesome Furry Keychain ...AKA... 
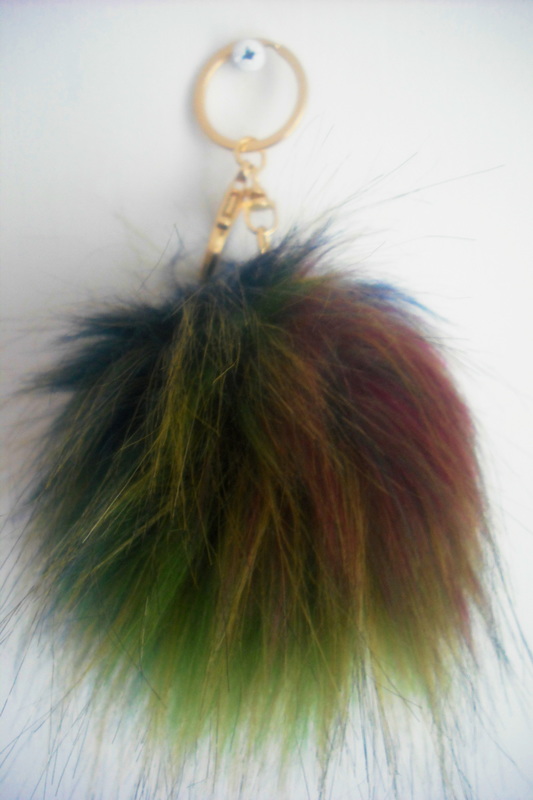
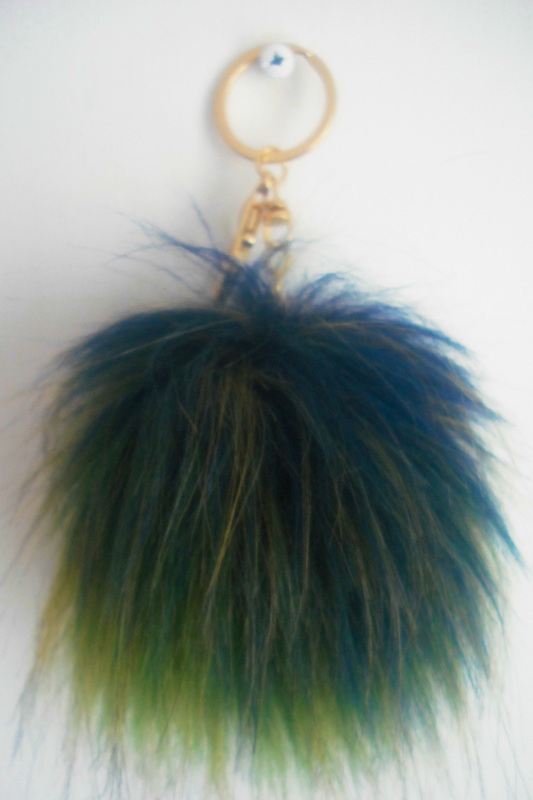
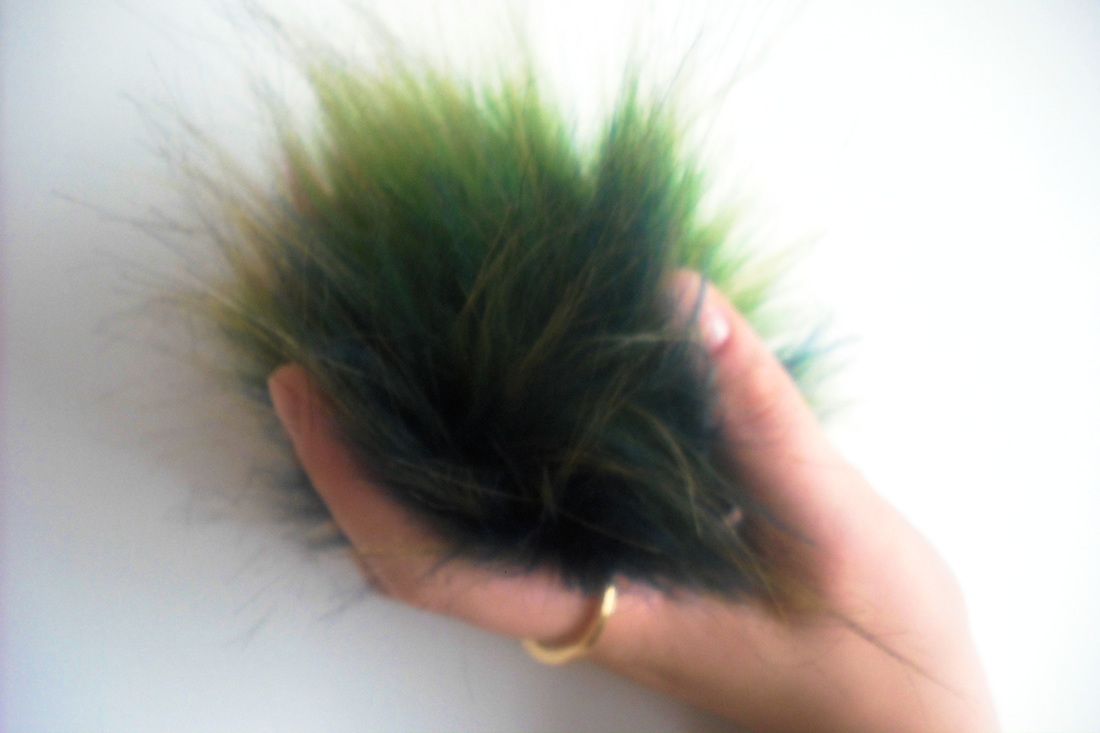
Of all the places to find a gorgeous, fluffy, giant key-chain, this is from the Family Dollar for two bucks. There were a multitude of available colors, I chose an aurora borealis blend of magenta, green, deep blue and a hint of yellow. It comes with two types of connector: a large lobster clasp and a split key ring. The chain has double swivel loops as well, which I think is a surprisingly classy touch. The chain and clasps are an incredibly bright gold, and I'm still undecided about painting over it with a more muted shade (probably using nail polish). The fake fur is very soft and I would say it has a medium shine-- not super glossy or matte. This is going on my backpack, ASAP. Definitely not an ad. I just like key-chains.
A few months ago I found this small backpack in a Goodwill for $4, and have been using it most days as my shuttlecraft (big backpack is the mothership and little backpack comes out for short range missions). The material looks and feels like a stretchy, slippy vinyl, and its straps are secured with velcro, allowing me to attach them to each other transforming this into a cross-body. A translucent label sewn on the top flap has "b-bags" embossed in black. Its interior has no brand labels, only a tag reading: SYNTHETIC LEATHER MADE IN CHINA which I find incredibly hilarious, considering this material resembles leather in no way whatsoever, unless you think every material that isn't a woven fiber must be analogous to leather. My research into this bag and brand have been unsuccessful, so judging it solely on appearance I would optimistically date this between the late 90s to early 2000s. Pessimistically, this is just some bag with no quasi-vintage provenance. But I love it, so who cares, right? The previous owner may have been incredibly gentle, but I believe this bag was in almost-new condition when I found it because with my repeated use small tears have been propagating along the top curve where vinyl attaches to the polyester straps. My original idea went as follows: cut a long, narrow piece of a supporting material (in this case, black marine vinyl) and glue it along the top seam of my bag. This new trim would stop any tears from propagating further and evenly distribute the load to minimize future damage. The glue wasn't setting as quickly as I had hoped, so I left my bag overnight. Next morning I check my work and pull the trim gently to test adhesion-- shock of shocks it peels away leaving no residue on my bag! Obviously Chinese "synthetic leather" is some kind of magic material and it's the first time E6000 has failed me. The end. Well, in a way... I'm a bit glad this repair didn't work as planned when the marine vinyl went on bulkier than I hoped. This now provides me an opportunity for a do-over. My original concept is sound, I just want to find a thinner material and need a different glue. And in case anyone cares, it did occur to me to sew on the trim, but I am wary of poking more holes into my backpack.
Always try to Fix It and always be ready to fail, we'll see how this one goes. Beading Faux leather part 3/3At the conclusion of my Wear It Out post I had been unsure whether I would be able to find matching purple beads to continue my work, or be forced to remove the sleeves of my jacket. I also had to purchase more red seed beads, 80 grams worth, but thankfully they were easy to find. The purple color most closely matching what I needed finally came from a friend's bead collection. Couching beads On my sleeve cuffs I felt it would be a bit uncomfortable to have beaded fringe so I "couched" the beads, a method for sewing them flat. There are a few different ways-- attach the beads down one at a time, use two needles (one for the beads and a following needle for securing them) but the diagram below shows the method I prefer. I hadn't yet mentioned in my previous posts the effort I have taken to avoid stitching into the lining of this jacket. It's in excellent condition and any wayward stitches would sully the appearance and potentially make my garment uncomfortable. The top of the shoulders and the cuffs are the only areas I was unable to keep the lining free, otherwise I was regularly checking the interior of the jacket to make sure the lining was not getting caught in my sewing. Project Breakdown Polyester thread: $1 Red seed beads: $3 a pack, I bought two packs but would have needed three if I had started from scratch Purple beads: $6 if I had purchased them myself TOTAL: $16 if I was starting without any materials, but in reality I spent closer to $9, and I already had beading needles. The jacket or pleather garment, regardless of who is doing this project, hopefully doesn't cost you any money if it is this damaged. The biggest investment required to make this has been time. I didn't keep track of my hours, but I am going to estimate a solid thirty to forty. Some may wonder why I would spend so much time on a old damaged garment but my reasons are simple: I love this jacket, I love learning a new craft (this was my first major beading project), recycling garments is important to me, and lastly, I don't feel my efforts are wasted because when this jacket is too damaged to continue repairs, I can cut out all of my fringe areas and use them on something else. I estimate this work contains 130g red seed beads and 70g purple. A total of 200g is .44 pounds! The extra weight is noticeable when compared to the jacket's original weight but isn't uncomfortable at all. This project has been my subtle (or not so subtle) homage to all Klingons which is why it's been categorized in Star Trek work.
Thankfully it was before I made a single stitch that I realized how much I hated my original color scheme. I matched my threads to the pattern, and what did I see? Beige, brown, tan, white. As I thought about how I want my project to look and what I like to wear, it became clear that I really needed to amp up the colors if it was going to match my aesthetic. The point is to remain flexible with your projects, especially when it is an original design. I zoomed over to my computer, switched up the colors a bit, and now I have a Technicolor Lieutenant Commander. I realize he is very green. However, as you will see from my WIP photos I am not actually making Lt. Commander Kermit. Data's android face is more of a milky yellow, and I am using artistic license by making greens, blues and teals the shadow tones. Perhaps this is alluding to his time with the Borg? Who knows. After I stitched the brown shadow line in the center of his mouth I realized I really should have added a backing, also known as a stabilizer. I solved this problem by basting on a black backing fabric of cotton/polyester blend. It has no stretch and is pre-shrunk. Pushing and pulling the needle through these fabrics is shockingly difficult, which is where the pliers come in! Most of the time I am able to stitch along without a problem, holding the needle with my thumb and pointer finger of my right hand. However, strain this area, and you are messing with the muscles and tendons in your forearm which can be incredibly painful, and can lead to carpal tunnel. Using the pliers to pull the needle out does slow my work a bit, but really makes a difference in tough spots. So at this point I wanted to add the J&P Coats to DMC colors conversion, for anyone who wanted to copy my color scheme... and learned the floss I have been using may be a knockoff! I added a few paragraphs to my Needlepoint Intro post going into it. Fact is, for me it makes little difference because I prefer to eyeball the colors until it "feels" right. And for anyone who wanted to copy this, I encourage them to do the same. If there is ever a demand for it, I will take my piece to the yarn shop I frequent and manually match up my colors to DMC, but until then, too bad. Don't know how to stitch? My Needlepoint Intro may help!
Since I learned needlepoint I have been waiting to make myself a large Data for the front of a garment, combining my passions for Star Trek and needlecraft. Though due to an overwhelming sense of frugality it took me a while to assemble all of the pieces for this project: 1. Suitable foundation garment. I found this great hoodie for $3.50! 2. Waste canvas. This allows me to rely on the grid used for needlepoint, and when finished the grid threads pull out. Bought it on Ebay. 3. Pattern. I made the pattern myself using a photo from Memory Alpha. In Gimp I cleaned up the image, simplified it, adjusted the colors, pixelated it, and added the guiding grid lines.
I can say from the start I will not be following the pattern I made exactly, but it will be an indispensable guide, especially for the placement of his facial features. I want it to resemble the character, after all.
Before finally getting stitching, all I need to do is confirm I have enough embroidery floss in the proper gradient range to ensure I don't run out halfway through with nowhere to turn. |
Categories
All
Archives
April 2018
|