Reviving a faux leather jacket
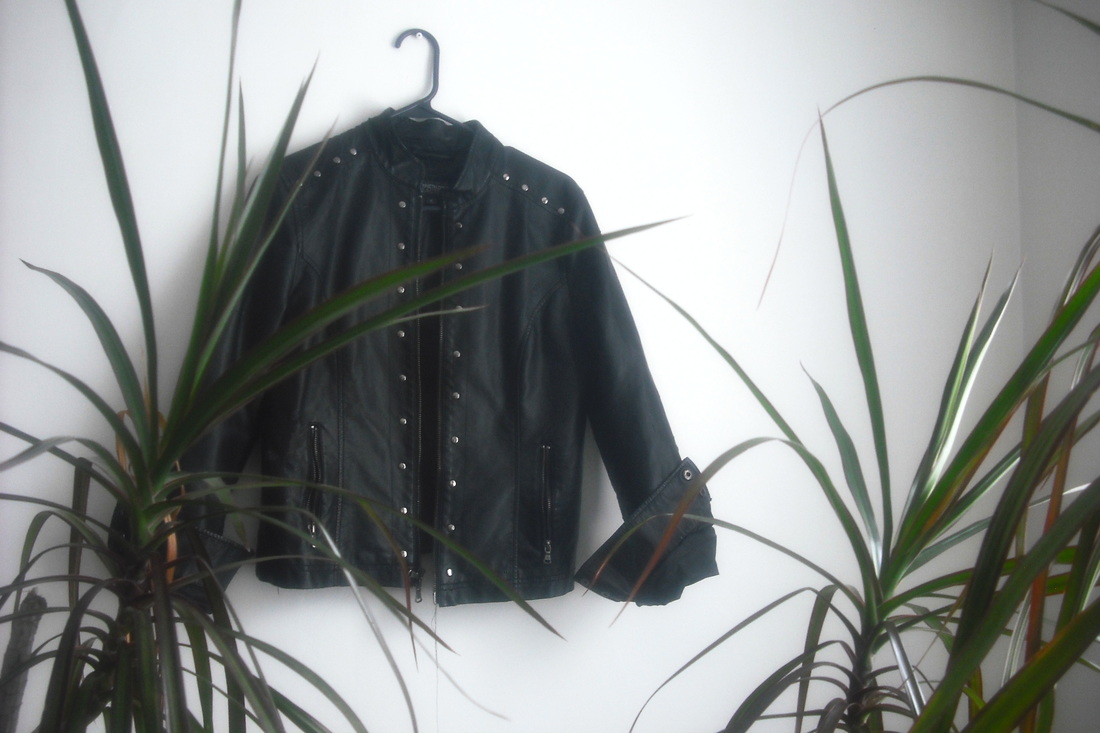
Kenneth Cole Reaction in its natural habitat
My experience with faux leather is that sooner or later it is going to start peeling. It is hard to determine how long an item will last before falling apart, and in my (limited) experience the initial cost of the item isn't necessarily indicative of quality. I've had a Betsey Johnson bag start peeling apart horrendously after a few weeks of use, yet a cheap little jacket from a fast fashion chain lasted through multiple washings and daily wear for a year.
Faux leather is simple enough to explain: polyurethane (PU) plastic is bonded to a woven fabric base and textured to appear like actual animal hide. It can be matte or shiny, and is usually water resistant if not waterproof. I believe the PU coating begins to peel up from the fabric because as the coating and backing fabric stretch at disparate rates they begin to separate.
Unfortunately my experiments with gluing down any peeling areas had been less than successful. I realized that if I can't mask the flaws, why not enhance them in a beautiful way?
The Concept
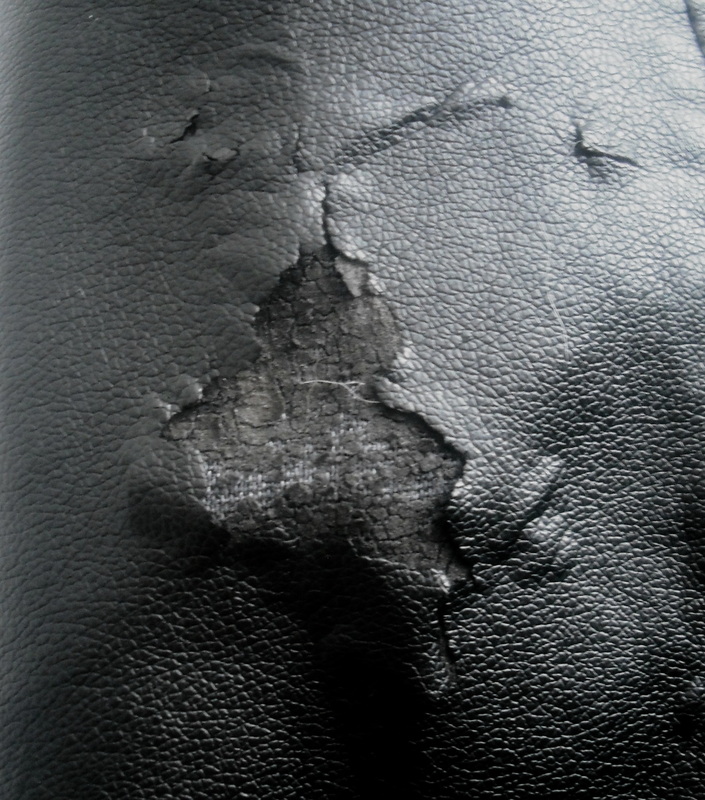
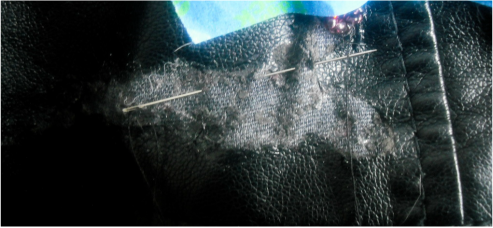
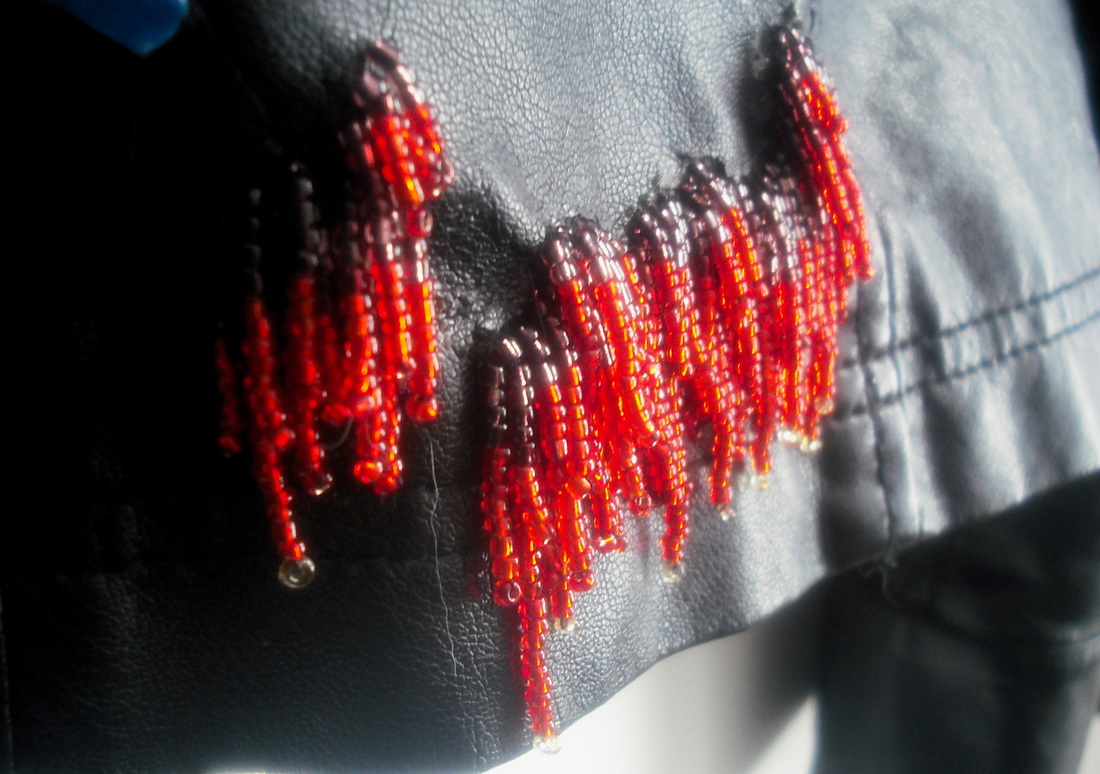
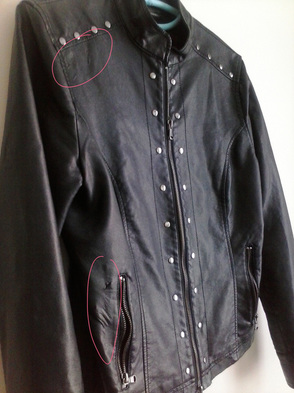 | No portion of the jacket is unaffected. This photo shows damaged areas at the shoulder and pocket, but the arms and back have also peeled extensively. Damaged areas are subtle at first-- wrinkled spots that look like bubbles flake away with barely any effort to reveal a crumbled underside and fabric backing. |
The tears in my jacket look like wounds; it didn't take long for the image of blood pouring out of my garment to take hold. And how better to create an artistic representation of blood than cascading red seed beads...
Sewing WITH Beads
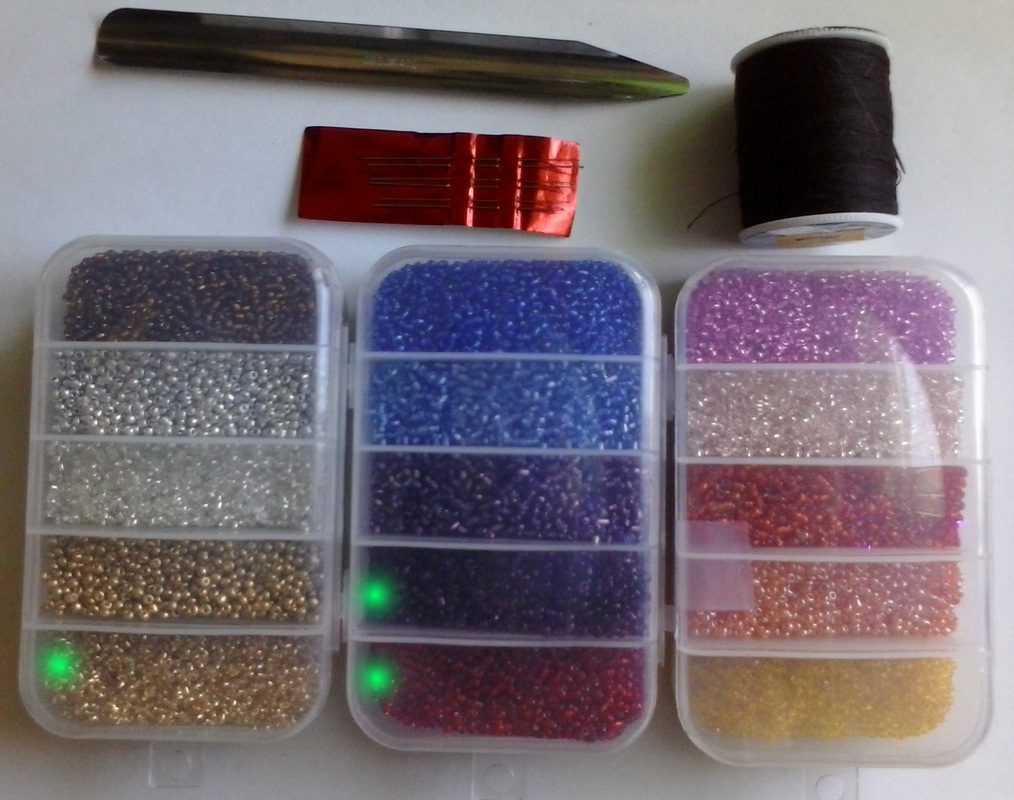
My supplies are on a medium sized baking pan to catch any stray beads
Beading needles
Polyester Thread (this is important, don't use cotton thread as it may snap.)
Beads --The green spots are over the beads I am using, I thought I would use some from the colors on the far right but in my test strands the effect was more muddled than I liked.
(Bead Scoop is pictured but I haven't needed it)
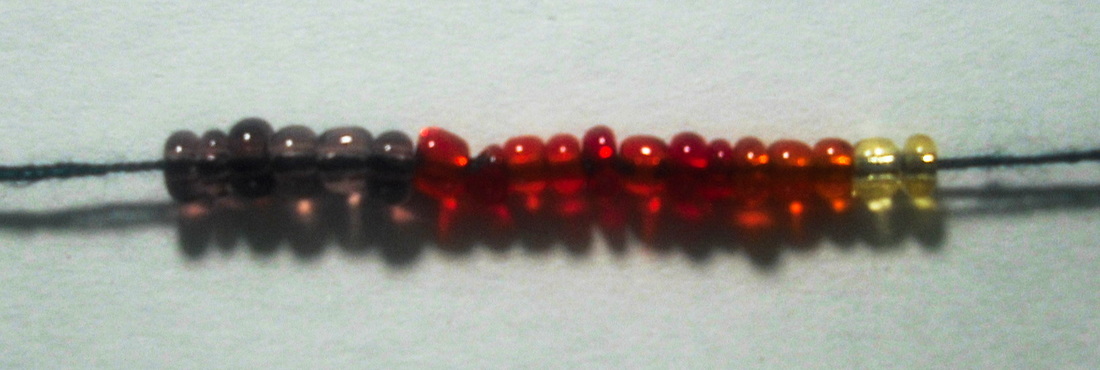
Bead Test -- this is an important step to help visualize the finished product. After sewing a few strands I opted to remove the orange beads and only use a single golden drop at the end of the longest strands.
Before starting any sewing you must make sure the backing fabric is strong enough to withstand the stabbing of a needle and the tugging of knots and bead strands. I used a large needle to pierce through the fabric and tug the material's weave-- since it didn't rip I decided it was good enough. In this jacket the backing fabric is 61% Viscose, 20% Polyester and 19% Cotton.
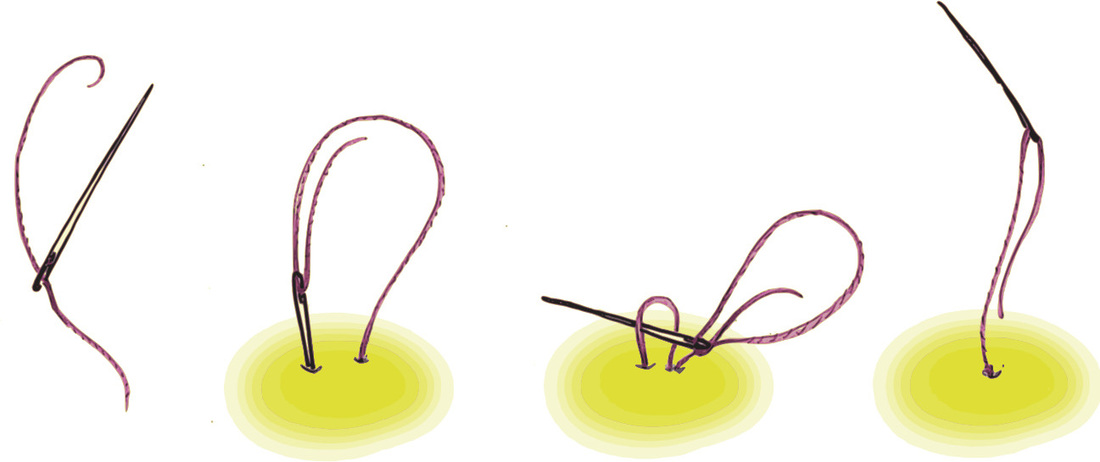
Above: Don't make a knot in the end of the thread and expect it to be effective. Instead, thread your needle into the fabric, leaving a long tail on the obverse side. Insert the needle into the fabric again and up through the front-- before the loop closes guide your needle through the loop and pull taught. I do this two or three times before the beading and after.
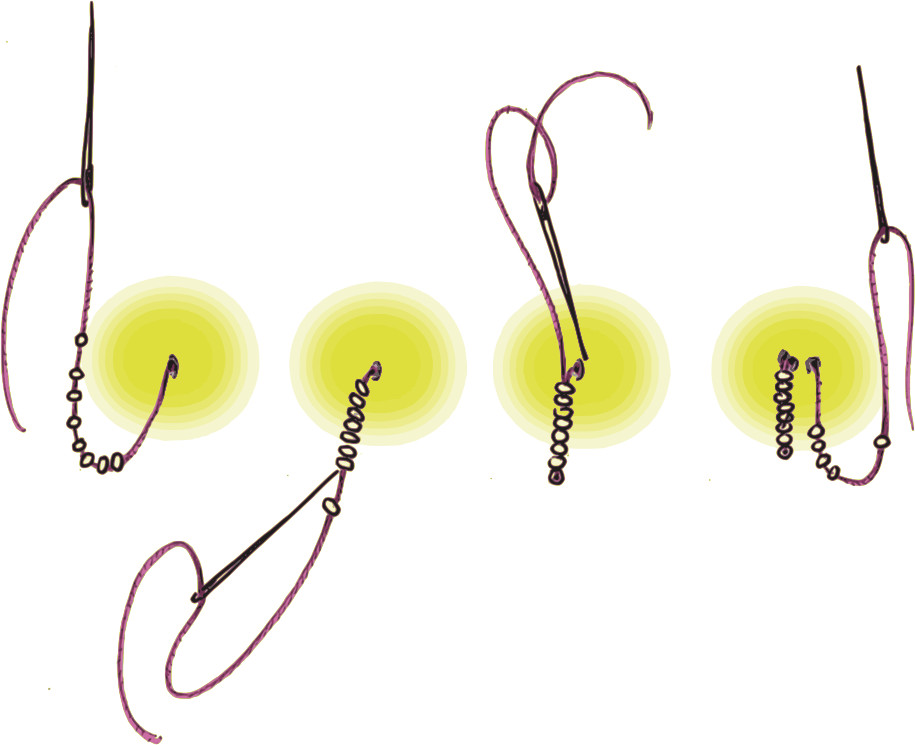
Above: After securing your knot add as many beads as you want. When your length is reached take your needle and bypass the bottom bead then thread it up through the entire strand of beads. At the top I make two or three knots to fully secure the beads and start the process again. Each length of beads is individually secured now, so if I were to lose a single strand it won't cause a cascade of all the beads. The best test is to make three or four of these bead strings next to each other, secure your knots, and then give your beads some strong pulls. Worst case scenario you end up with a few beads on the floor and you re-do it. When I am almost out of thread and have secured my knots I push my needle through the beads of my last strand and clip the thread at the bottom of the beads. Knots can work loose if you trim the thread right at the base, so you want to leave a tail, and this is a way to disguise it.
The blue tape above is holding finished strands of beads to keep them from my work area. I like working from the bottom of the damaged area to the top, but experiment until you find the method you prefer.
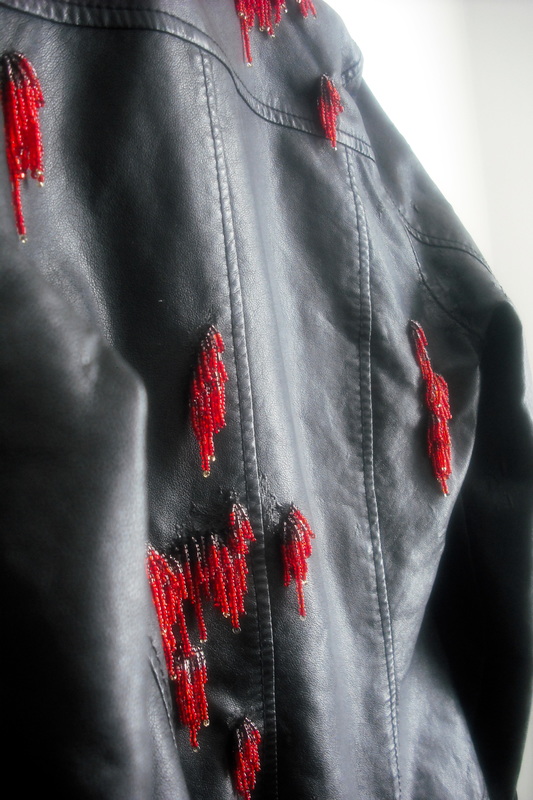
By my estimate I have beaded around 60% of the damaged areas and I love its effect. The beads are dramatic but I don't feel like my work is clashing with the jacket. Though I tried to avoid using glue, I actually have been securing the areas around each beaded portion. I don't love how glue has affected the appearance of the PU but without it my material was continuing to peel. At this point my conundrum is whether or not to remove the sleeves-- I really don't want to, but I am running low on purple beads and have not found a match in local stores.